Exporting FCS File Data from a Single File
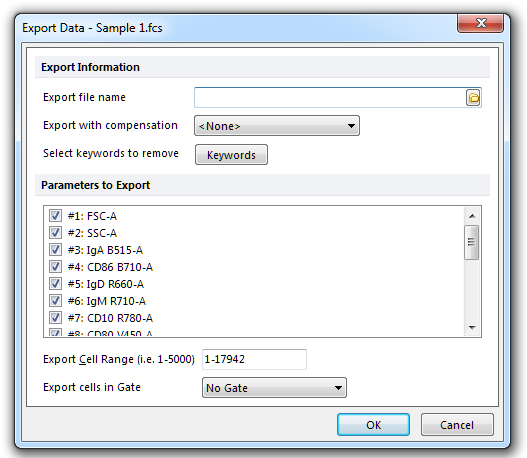
To export the data from an open FCS file, use the Data tab→Save/Load→Export command to bring up the Export Data dialog (Figure 17.5).

Figure 17.4 Export Data dialog
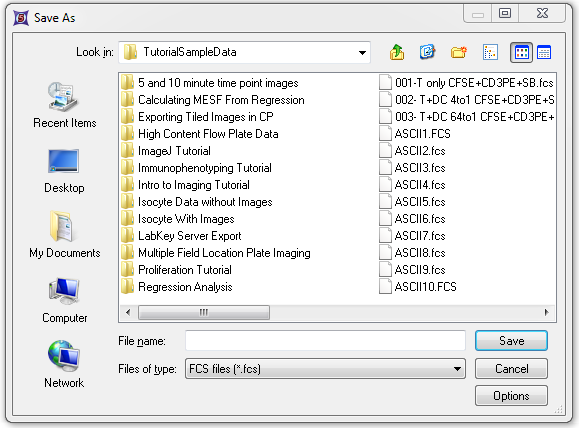
You must assign a name and file type for the data you are exporting. It is recommended to click the folder icon to the right of the Export file name field. This will bring up a Save As dialog (Figure 17.6) where you can choose the folder to save the data in, enter a file name, and choose the file type from a drop down menu.

Figure 17.5 - The file export Save As dialog. Note the files of type dropdown list and Options button.
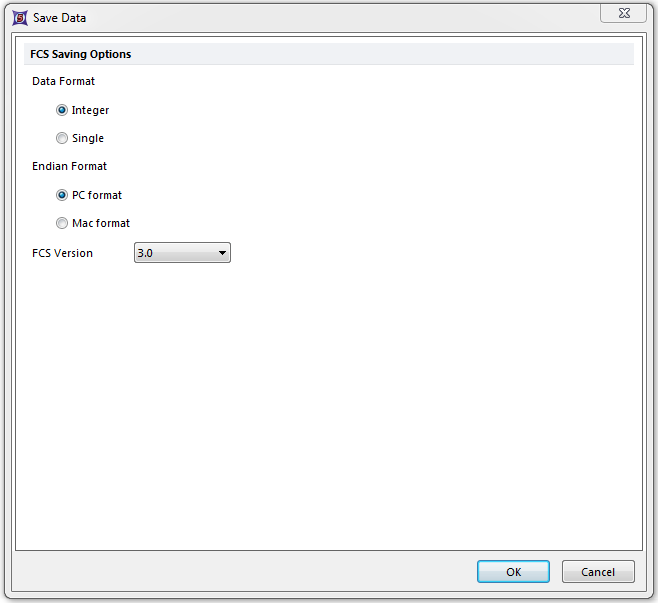
The Options button will allow you to set the specific options for the data format as seen in Figure 17.7.

Figure 17.6 - The Save Data dialog allows you to choose the format of the data file saved.
You can export the data as a text file (*.txt), comma separated values file (*.csv), tab separated values file (*.tab), space separated values file (*.prn), FCS file (*.fcs), ICE file (*.ice), or a DNS data stream file (*.dns). After assigning the file name and type, click Save.
You have a choice of exporting the data with or without compensation using the Export with compensation drop-down list. If compensation definitions have been defined for the file you are exporting, they can be selected from the list. Keywords can be excluded from export using the Keywords to remove button.
There are many options to choose exactly which data to export:
| • | Select which parameters to export in the Parameters to Export list box. |
| • | Choose which cells to export, by cell number in the Export Cell Range field. The format is [first cell number-last cell number]. By default, the numbers represent the first and last cells in the file. |
| • | Use the Export cells in Gate drop-down list, to export cells only within the specified gate. |
When you are ready to export, press OK.
