Working with Pages
There are several ways to add a new page to a layout. The following three methods will add a new page after the current page:
| • | Select Home→Pages→New Page and choose the kind of page you want to insert from the ribbon. |
| • | Right-click on the layout and select New Page from the pop-up menu. |
| • | Click on the Add Page tab (Figure 4.7) of the Layout Navigation Toolbar (near the bottom of the FCS Express application window on the left). |
Figure 4.7 Add Page Tab
To insert a page into the middle of an existing layout, right-click on an existing labeled Page Tab on the Layout Navigation Toolbar (e.g., "Page 1") and select Insert from the pop-up menu. This will insert a blank page before the page you selected. To rearrange pages of a layout, select the tab of a page on the Layout Navigation Toolbar and drag the tab left or right to the new location.
You can rename pages. To do so:
| 1. | Right-click anywhere on the page (or on the tab associated with the page) and select Format from the pop-up menu, or double-click on the Page Tab. |
| 2. | In the Formatting Page dialog that appears, type the new name into the Name field (located in the Name category). |
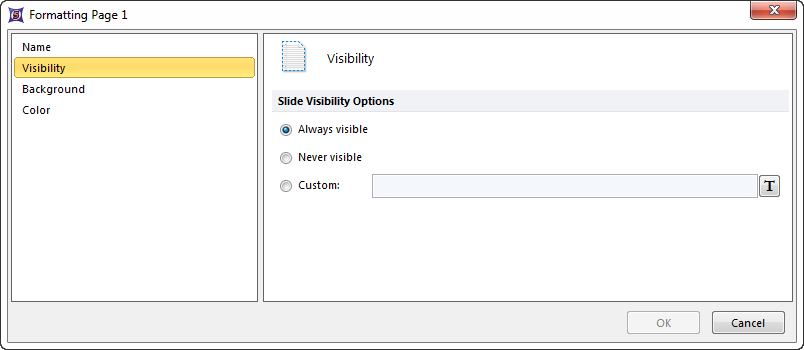
The visibility of a page can be controlled from the formatting dialog.
| 1. | Right-click anywhere on the page and select Format from the pop-up menu. |
| 2. | In the Formatting Page dialog, click on Visibility (Figure 4.8). Using the radio buttons, visibility can be set to Always visible, Never visible (i.e., hidden), or Custom. If you choose Custom, you can insert a token that evaluates to a Boolean expression (by clicking on the |

Figure 4.8 Formatting Page Visibility
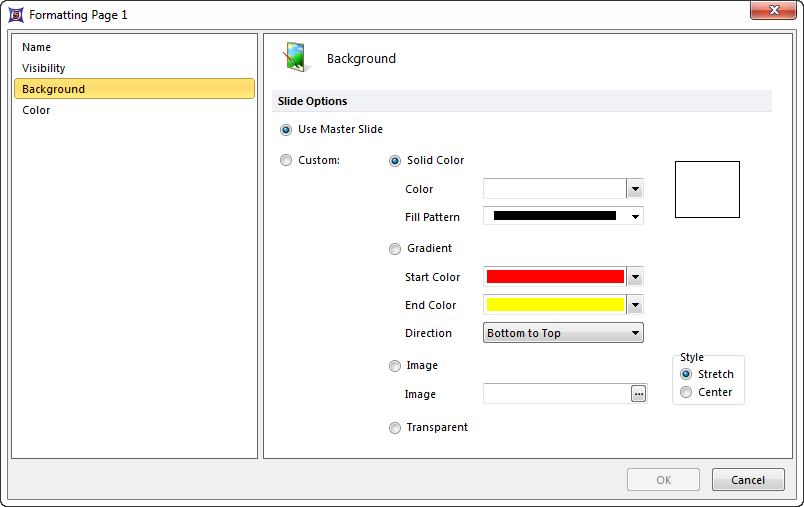
The default background of a page is the background of the master page. Each page can have a custom background, however. To change the background of an individual page:
| 1. | Right-click anywhere on the page and select Format from the pop-up menu. |
| 2. | In the Formatting Page dialog, navigate to the Background category (Figure 4.9). |
| 3. | Click on the Custom radio button. |
| 4. | Choose the Color/Fill Pattern, Gradient, Image, or Transparent. |

Figure 4.9 Changing an Individual Page Background
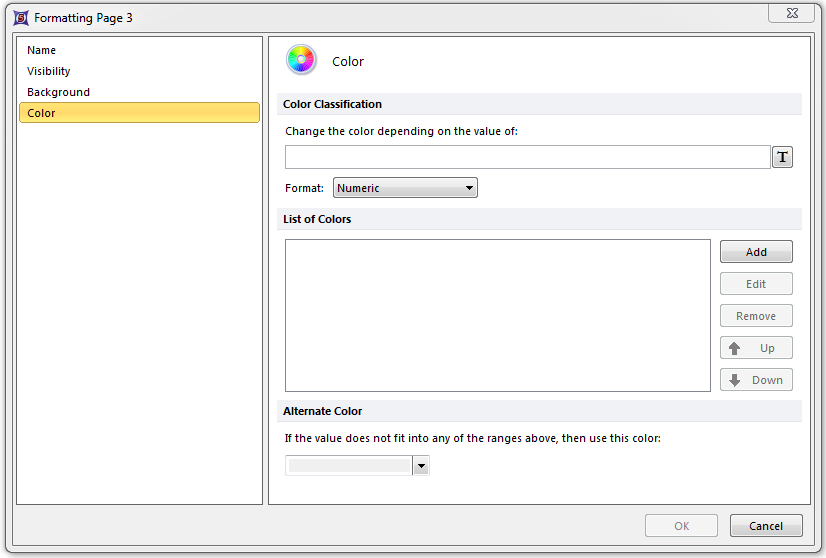
The color of a page tab may be controlled from the formatting dialog based on a series of Color Classifications.
1. In the Formatting Page dialog, click on the Color category(Figure 4.10).
2. Using the Change the color depending on the value of: dialog you can insert a token that evaluates to a Boolean expression (by clicking on the ![]() button), and the color of the page tab will change if the token evaluates to any of the classifications in the List of Colors section.
button), and the color of the page tab will change if the token evaluates to any of the classifications in the List of Colors section.

Figure 4.10 Changing the Page tab Color classifiers
3. List of Colors allows you to create a series of classifications for colors by clicking the Add button in the List of Colors dialog.
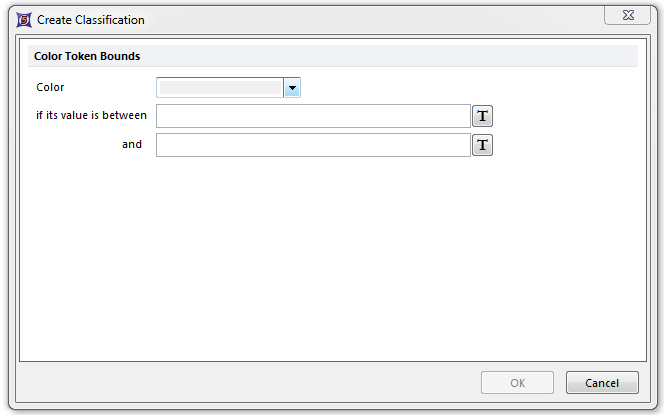
4. The Create Classification dialog will open (Figure 4.11) where you can choose a Color for the page tab if a value, numeric or token based, falls in a range you define.

Figure 4.11 Adding a page tab color classifier with Color Token Bounds.
5. The Edit, Remove, Up, and Down commands in the Formatting→Color dialog allow you to adjust the List of Colors and Color Token Bounds as needed.
There are several ways to delete the current page:
| • | Select Home→Pages→Delete Page. |
| • | Right-click on the layout page and select Delete Page from the pop-up menu. |
| • | Right-click on a Page Tab (e.g., "Page 2") on the Layout Navigation Toolbar and select Delete from the pop-up menu. |
