Setting Up the Panel
In the course of this example, we will:
| • | Learn how to set up a panel. |
| • | Learn how to set up a file list with the experimental files to be analyzed. |
In this tutorial we will be analyzing 2 samples, each comprised of a set of 2 tubes. The panel will consist of the tubes that comprise the "set", which will repeat itself.
We will begin by defining the panel and then setting up the data list.
| 1. | Open a new, blank layout. |
| 2. | Select the Batch→Organize Data Sets→Panels command (Figure T10.1). Alternatively, select the Data→Organize Data Sets→Panels command. |
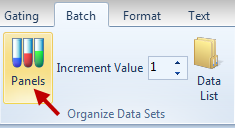
Figure T10.1 Selecting the Panels Command
The Panel Information dialog appears as shown in Figure T10.2.
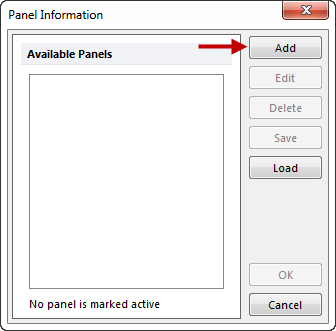
Figure T10.2 Panel Information Dialog
| 3. | Click the Add button (Figure T10.2). |
The Add Panel dialog will appear as shown in Figure T10.3A.
| 4. | Enter "My Panel" in the Panel Name field. |
| 5. | Click on the upward triangle in the Number of Tubes spin control until it reaches 2. The dialog should now look like Figure T10.3B. |
| 6. | In the Name column, name Tube #1 "T cell markers" and Tube #2 "B cell markers" The dialog should now look like Figure T10.3C. |
| 7. | Click OK to close the Add Panel dialog. |
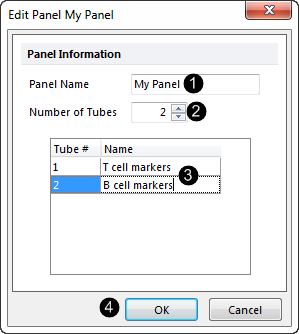
Figure T10.3 Setting up a Panel using the Add Panel Dialog
The Panel Information dialog will now appear updated with the newly added panel information, as shown in Figure T10.4.
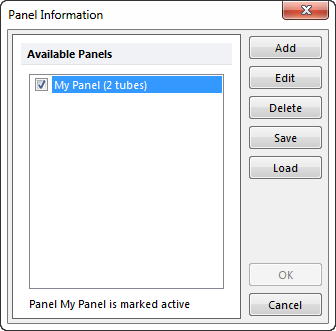
Figure T10.4 Updated Panel Information Dialog
| 8. | Click OK to close the Panel Information dialog (Figure T10.4). |
The next step consists of using the Data List to set up a list of the files we want to analyze using the panel.
| 9. | Select the Data→Organize Data Sets→Data List command (Figure T10.5). Alternatively, select the Batch→Organize Data Sets→Data List command. |

Figure T10.5 Selecting the Data List Command
A Data List window opens as shown in Figure T10.6.
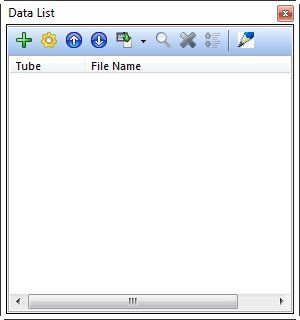
Figure T10.6 Data List Window
| 10. | Click the Add |
The Select a Data File dialog opens (Figure T10.7).
| 11. | Navigate to where the Tutorial Sample Data folder is located. |
| 12. | Select the 4 files named Normal2_Tube1, Normal2_Tube2, Normal3_Tube1 and Normal3_Tube2 as shown in Figure T10.7. (To select multiple files at once, click on the first file, Normal2_Tube1, press and hold the Shift key on the keyboard, and then click on the last file, Normal3_Tube2.) |
| 13. | Click Open (Figure T10.7). |
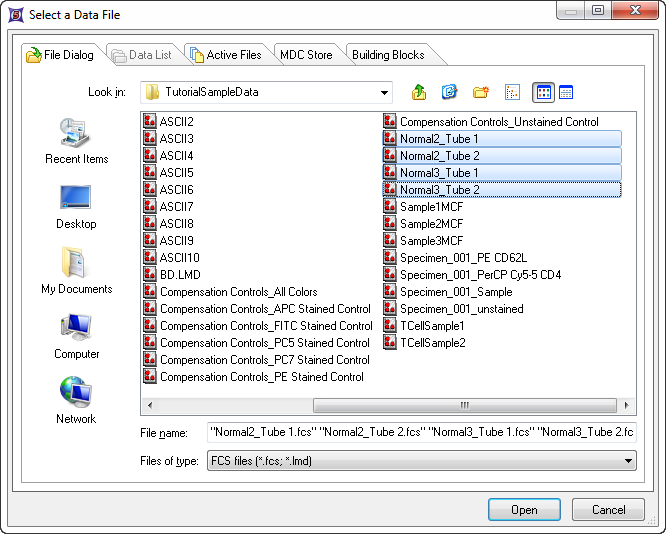
Figure T10.7 Selecting Data Files to insert into the Data List.
The Data List window is now updated with the list of files, and the associated path names, for the files just selected. The Data List should appear as shown in Figure T10.8, although different path names maybe displayed.
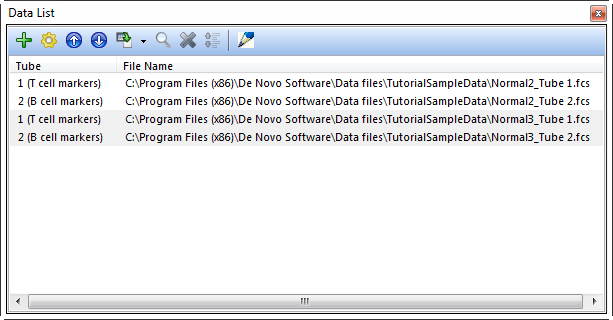
Figure T10.8 Updated Data List with Corresponding Tubes for the Panel
As shown in Figure T10.8, the Data List window shows the tubes from the panel you created in the left column, and the files you added in the right column. This greatly helps to organize your files into the corresponding tubes for further analysis. To further aid organizing the data files, FCS Express allows you to add keywords from the FCS file to the information displayed in the Data List. Keywords that are descriptive indicators of sample identification can be added to the Data List to easily identify which data files corresponds to each entry in the Data List. There are many keywords that can be used to help identify the data files within the Data List. In this tutorial, we will add the keyword $SRC to the Data List.
| 14. | Click on a sample in the Data List to highlight it. |
| 15. | Click on the Format button shown at the top of the Data List in Figure T10.8. |
The Format File List dialog appears, as shown in Figure T10.9.
| 16. | Select Add from the Format Data List dialog. |
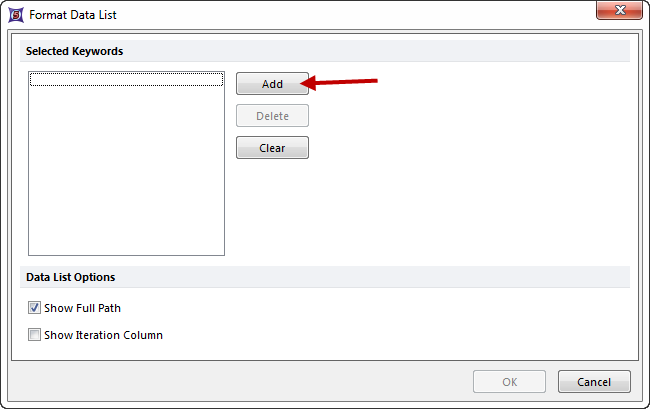
Figure T10.9 Format File List Dialog
The Please select one or more keywords dialog appears, as shown in Figure T10.10. This is where we will select the keyword $SRC to display in the Data List.
| 17. | Click on the down arrow to scroll down to the bottom of the list. |
| 18. | Click on $SRC, highlighted in Figure T10.10. If you want to display more than one keyword, you can select multiple adjacent keywords by holding down the Shift key on the keyboard or by selecting multiple non-adjacent keywords by holding down the Ctrl key while clicking on each keyword. For this example, we will only select $SRC. |
| 19. | Click OK (Figure T10.10). |
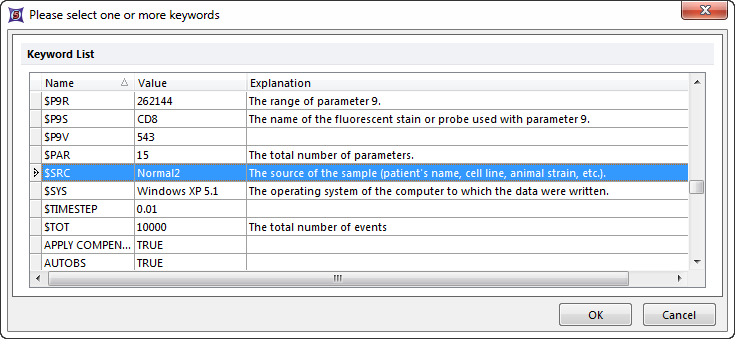
Figure T10.10 Selecting an FCS Keyword to use in the Data List
The Format File List dialog will be updated with $SRC in the Selected Keywords field, as shown in Figure T10.12. Also, the Data List can be formatted to not show the full pathway for where the data files were stored. The Data List can also be formatted to display your data in Groups.
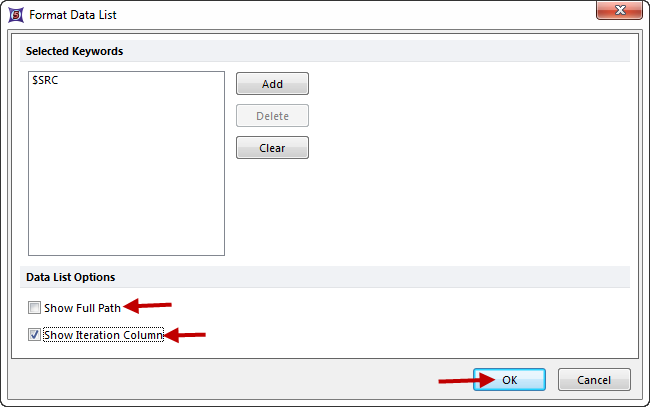
Figure T10.12 Updated Format File List Dialog with $SRC as the Selected Keyword
| 20. | Deselect the option to Show Full Path and select the option to Show Iteration Column, as seen in Figure T10.12. |
| 21. | Select OK on the Format File List dialog. |
The Data List dialog will now appear updated showing the grouping of the data files, the file name without the full path and with the column $SRC, as shown in Figure T10.13.
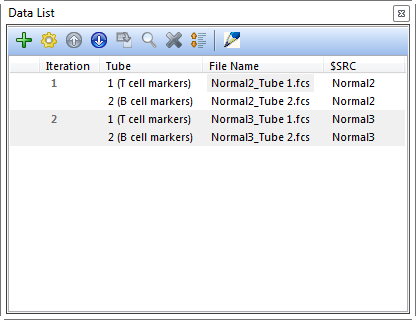
Figure T10.13 Data List Window Updated with Groups, File Names and $SRC Column.
You can use the icons at the top of the Data List dialog, (Figure T10.13) to manipulate the data files in the list.
As previously demonstrated, you can add more files to the Data list by selecting the Add button ![]() and you can format the list to include FCS keywords by selecting the Format button
and you can format the list to include FCS keywords by selecting the Format button ![]() . To move a file up or down in the Data List select the data file and then select the Up
. To move a file up or down in the Data List select the data file and then select the Up ![]() or Down
or Down ![]() arrows. To change a file, select the Change File button
arrows. To change a file, select the Change File button ![]() , and to search for a file select the Search button
, and to search for a file select the Search button ![]() . To delete a file from the list, select the file, and then select the Delete button
. To delete a file from the list, select the file, and then select the Delete button ![]() .
.
In FCS Express Version 4, any changes made to the order of the tubes in the Data List would automatically change in which plots those data files were being viewed as they are being moved. If your files are large, it could take some time for your layout to refresh as each tube is moved up or down the Data List.
However, in FCS Express 5, the user can now defer those changes until the files have been moved and placed in the required order. By clicking the Defer Layout Changes icon ![]() , the user can makes changes to the order of tubes, then, deselect the icon and the data would automatically refresh in the analysis layout.
, the user can makes changes to the order of tubes, then, deselect the icon and the data would automatically refresh in the analysis layout.
We will now proceed to creating the layout.
