Changing Axis Labels
Here we will change our User Options so that data file-derived Stain and Name keywords appear on our plot axes.
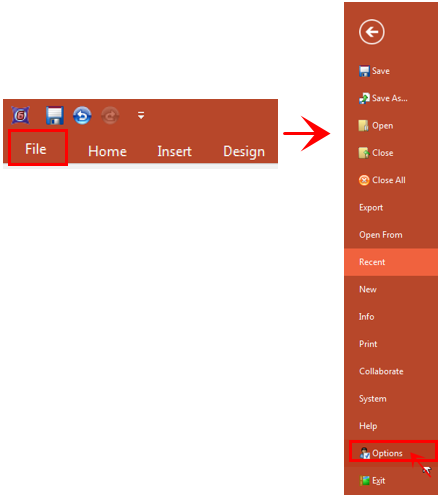
1.Select File tab→Options (Fig. T30.3, outlined in red).

Figure T30.3 Accessing Preferences from the Application Button
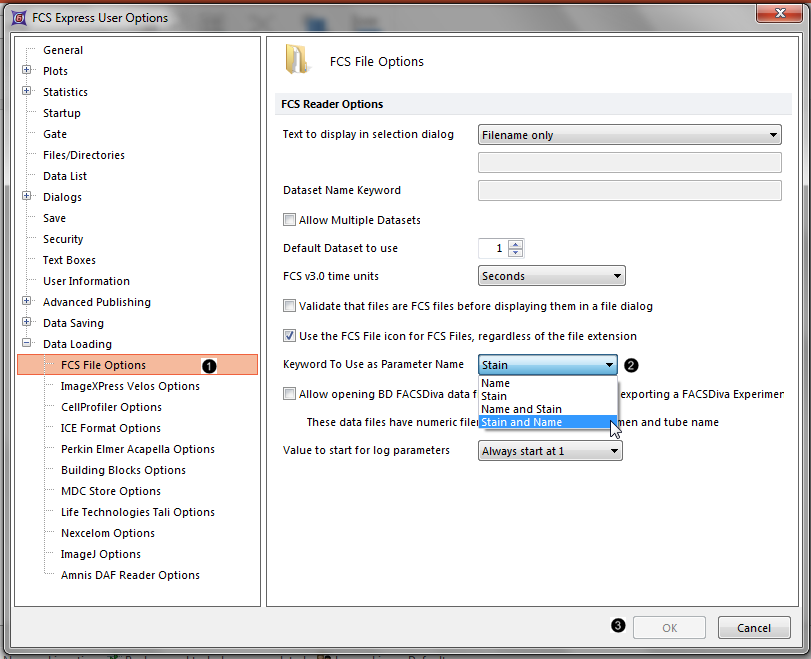
2.Click on the Data Loading category → FCS File Options at the left (Fig. T30.4, ![]() ).
).

Figure T30.4 Selecting Stain and Name as the Parameter Name for plot axes
3.Select Stain and Name from the Keyword to Use as Parameter Name drop-down menu (Fig. T30.4, ![]() ).
).
4.Click OK (Fig. T30.4, ![]() ).
).
| Now, as you load in new data files, your plot axes in FCS Express will be labeled with the values for the keywords that you have selected. These keywords values were saved with your data at the time of acquisition, however, you can edit keywords in FCS Express. |
▪Please note that different manufacturers will use different bits of information for each keyword value.
▪For example:
•on a BD analog instrument (FACScan, FACSCalibur)
oStain keyword = CD3 FITC, Name Keyword = FL-H
•on a BD digital instrument (anything which uses BD FACSDiva)
oStain keyword = CD3, Name keyword = FITC-A
