Customizing the Ribbon
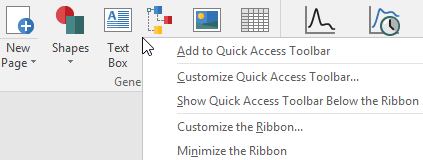
In addition to customizing the interface using the customize command to the right of the Quick Access Toolbar, right-clicking on an individual command within a group, or right-clicking on the name of a group, brings up a menu (Figure 3.18) which includes the command to Add to Quick Access Toolbar (or group of commands) to the Quick Access Toolbar.

Figure 3.16 Add Command to Quick Access Toolbar
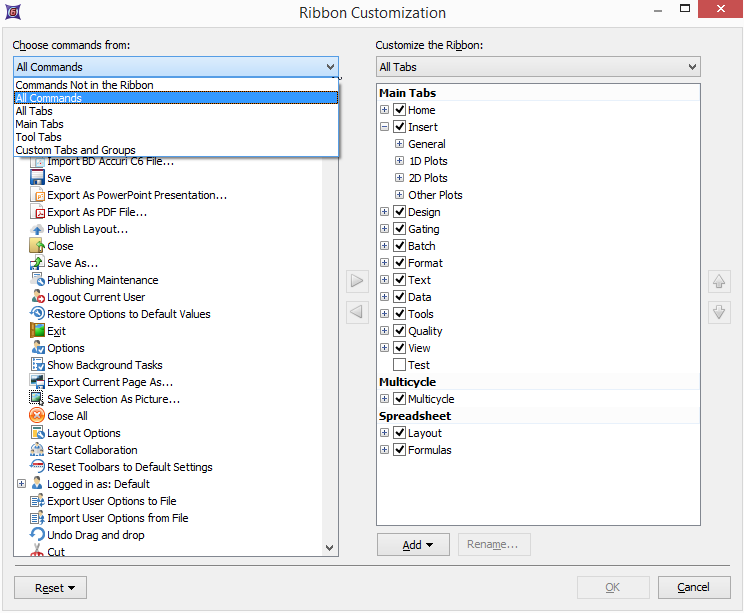
The Customize the Ribbon... item brings up a Ribbon Customization dialog (Figure 3.19). Commands or the Home, Tools, or Custom tabs can be chosen in the left column to be added to or removed from the Quick Access Toolbar in the right column, where they can be rearranged or hidden by unchecking the checkboxes.

Figure 3.17 - Ribbon Customization dialog
When the Customize dialog is open, you can perform many customizations to the Ribbon. To remove items from the Ribbon: click on the item to remove, hold down the mouse button, drag the item to an area within the Customize dialog, and release the mouse. If you drag the item to another part of the Ribbon, it will be moved to the position where you release the mouse. To add commands to the Ribbon, select the Commands tab. Select a command from the list and drag it to the position on the Ribbon (or Quick Access Toolbar) where you wish it to appear.
You can reset an individual group (toolbar) to its default state by selecting the toolbar in the Toolbars tab and pressing the Reset button in the bottom left corner of the window.
Under the File tab→System→Restore Options→Reset Toolbars to Default Settings command will restore all toolbars to the default settings.
