Formatting Plot Axes

Contents
FCS Express has many axis formatting options which allow you to customize the appearance of your axes any way you like. You have full control over the axis text, font, colors, and many other aspects of its appearance.
In order to demonstrate modifying the axis properties, we will continue with the layout we were using above.
In the course of this example, we will:
•Acquire an overview of formatting axes.
•Modify the axis font properties.
•Add grid lines to a plot.
•Change the angle of the axis labels.
To format the axes (numbers refer to Figure T3.20):
1. Right-click on the plot and select Format from the pop-up menu.
2. Click on the Axis category ![]() .
.
3. Click on the Y Axis ![]() to set the properties for the Y axis.
to set the properties for the Y axis.
4. Click on the Font button ![]() and change the font to Bold.
and change the font to Bold.
5. Press OK on the Font dialog to accept the font changes.
6. Click the Show grid lines checkbox ![]() to turn it on.
to turn it on.
7. Click on the X Axis ![]() to set the properties for the X axis.
to set the properties for the X axis.
8. Click on the Font button ![]() and change the font to Bold.
and change the font to Bold.
9. Press OK on the Font dialog to accept the font changes.
10. Change the Angle ![]() to 10.
to 10.
Press OK to accept the changes.
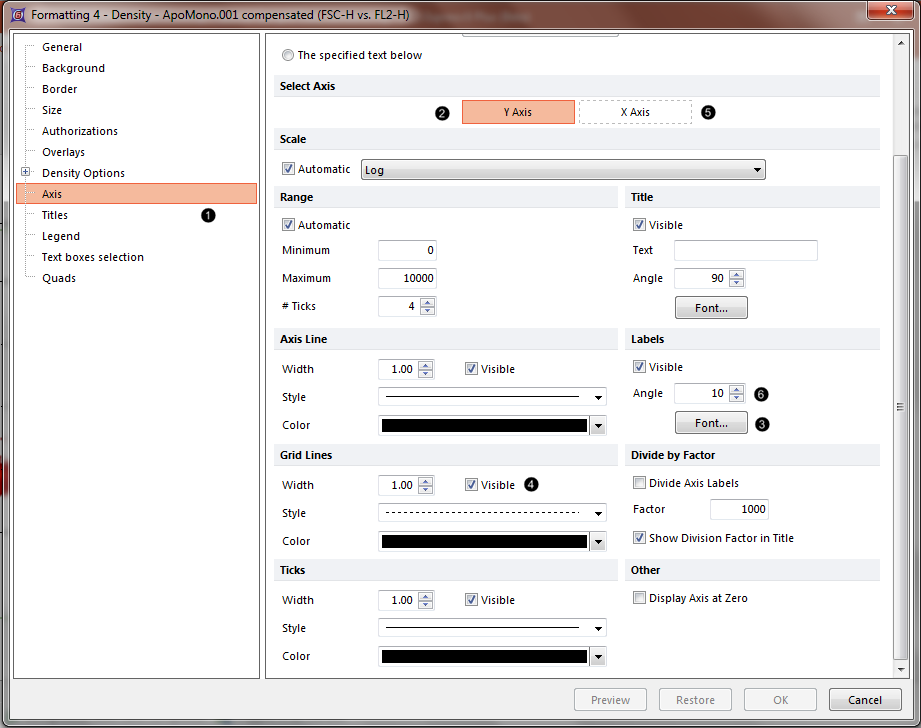
Figure T3.20 Axis Formatting
The axes of the plot have now been modified (see Figure T3.21).

Figure T3.21 Formatting Axis Example
In addition to changing the parameters displayed on the axis or axes of a plot via the Format window, you may use these keyboard or mouse commands.
In the next section, we will format the plot background.