Opening and Docking
To begin, we will open a saved layout that already has plots and gates on multiple pages.
1.Select File tab→Open.
2.Open the layout LayoutNavigator.fey found in the Tutorial Sample Data archive.
The layout appears. However, part of the layout is not visible, so we will now use zoom to view the whole layout page on the screen.
3.Click on the Zoom icon located in the Zoom Toolbar at the lower left corner of the screen (indicated by the cursor in Figure T14.1).
Figure T14.1 Zoom Icon
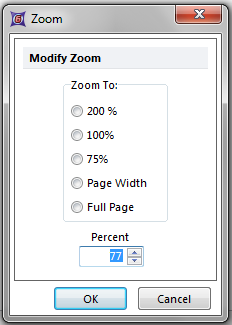
The Zoom dialog appears, as shown in Figure T14.2. Please note that the Percent number in the field at the bottom of the dialog window will be dependent on your screen and screen resolution.

Figure T14.2 Zoom Dialog
4.Select Full Page.
5.Click OK.
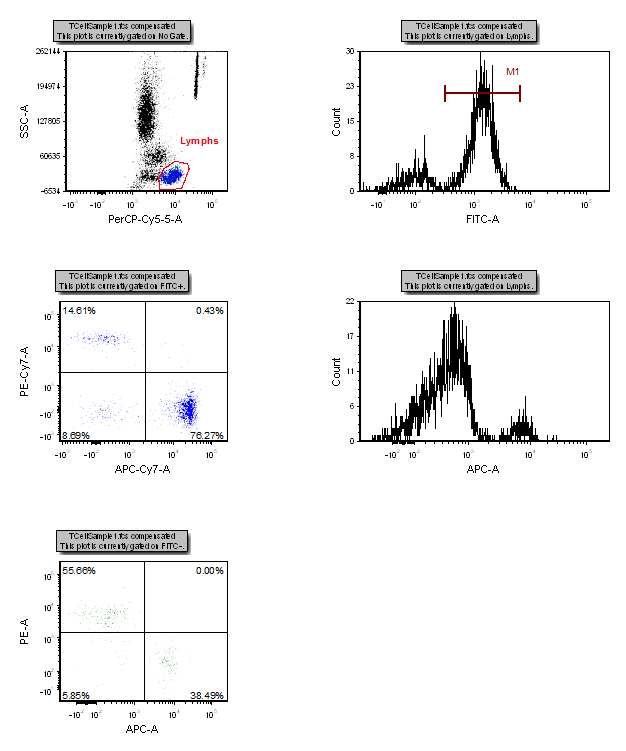
The layout page will update to display the full page of the layout as shown in Figure T14.3. Notice the tabs at the bottom of the screen (Figure T14.1) indicating there are two pages in the layout.

Figure T14.3 Layout Navigator - Page 1 Plots
We will now open the Layout Navigator.
6.Select the View→Navigators→Layout Navigator command (Figure T14.4).

Figure T14.4 Selecting the Layout Navigator Command
The Layout Navigator appears; we will now dock it to the right side of the layout. For more information on docking please refer to the Docking tutorial.
7. Place the mouse on the top border of the Layout Navigator window.
8. Press and hold the left mouse button and move the Layout Navigator window.
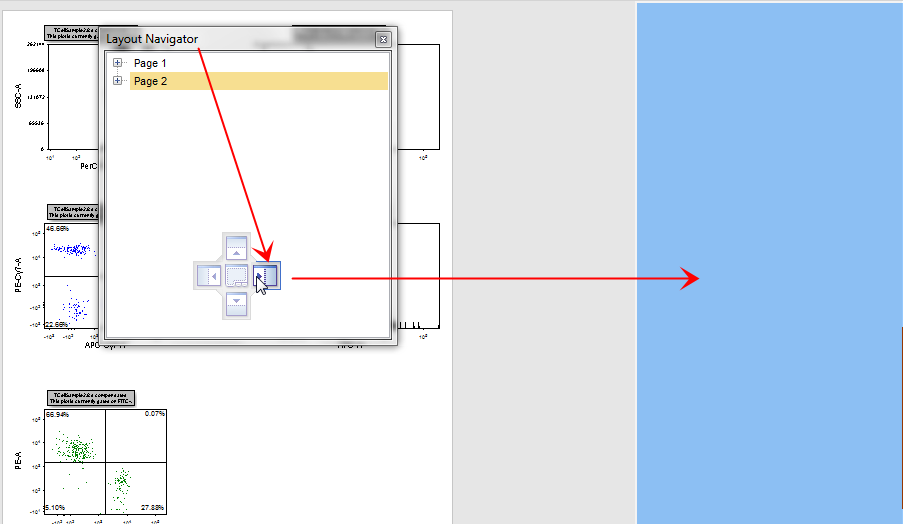
As soon as you start moving the Layout Navigator window the four-headed arrows of the docking icon appears in the center of the layout, as shown in Figure T14.5.
9. Continue to hold the mouse button and move the Layout Navigator toward the right arrow of the docking icon.
10. Release the mouse button when the cursor is over the right arrow of the docking icon, indicated by the cursor in Figure T14.5. You will know you are in the right place because the blue rectangle, indicating the proposed docking location, will appear on the right side of the layout.

Figure T14.5 Docking the Layout Navigator
The Layout Navigator is now docked on the right side of the layout. However, not all the text is visible so we will now resize the docked window it to make it wider.
11. Right click within the Layout Navigator and select Expand All.
12. Place the mouse over the outer left border of the docked Layout Navigator.
13. Move the mouse slightly over the border until the resizing icon appears.
14. Press and hold down the left mouse button and continue to hold it while dragging the border to the left.
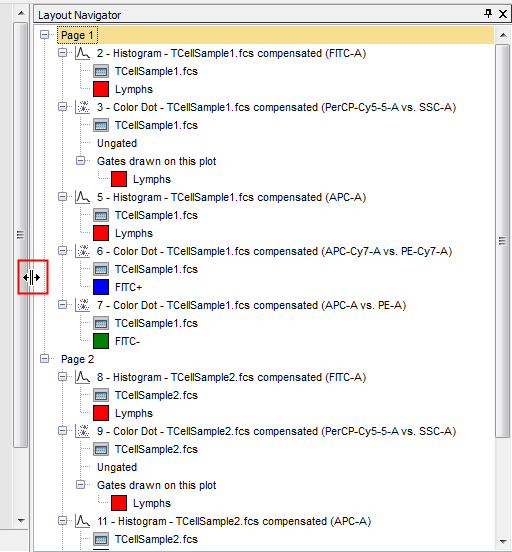
15. Release the mouse button when the docked window is large enough to show all the text of the Layout Navigator, as shown in Figure T14.6.
16. If necessary, use the scroll bar on the right side of the docked window to scroll up and down the Layout Navigator.
The docked Layout Navigator should appear similar to Figure T14.6.

Figure T14.6 Docked Layout Navigator
In the next section, we will learn the features of the Layout Navigator.
