Docking Features (Multiple Windows)
We now will open more Navigators and the Custom Tokens window; dock them to demonstrate the features of docking with multiple windows. Please refer to the previous section for details on docking and open Docking.fey if necessary.
1.Click the View tab→Navigators group→Data Navigator command.
The Data Navigator window will appear on the layout.
2.Dock the Data Navigator window to the left of the layout.
The layout now has two windows docked, Gate Navigator on the bottom and Data Navigator on the left (Figure T12.10).
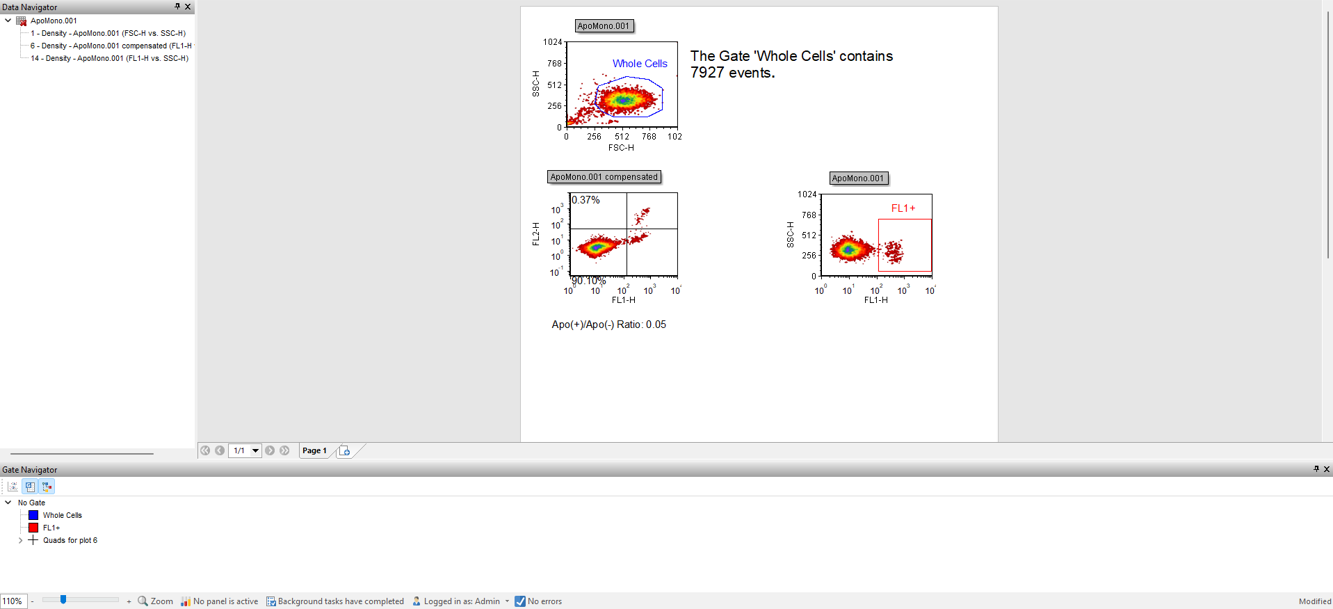
Figure T12.10 Layout with Gate Navigator and Data Navigator Docked
3.Click the View tab→Navigators group→Layout Navigator command.
The Layout Navigator appears on the layout. We will dock the Layout Navigator to the left side of the layout.
4.Carefully drag the Layout Navigator by its title bar toward the left side of the layout.
When you first start to drag the Layout Navigator several docking icons will be revealed, indicating the possible docking locations for the navigator being moved (i.e. the Layout Navigator in this example) (Figure T12.11).
•the four-headed arrow docking icons appears in the following places:
oin the center of the layout (Figure below; upper red outline)
oin the center of the Gate Navigator (Figure below; lower purple outline)
oin the center of the Data Navigators (Figure below; blue outline).
•the individual docking icons (Figure T12.11 below; orange outlines) appear at the edges.
Once the Layout Navigator is moved away from the center of the layout and toward the left edge, the four-headed arrow docking icon in the Gate Navigator and the four-headed arrow docking icon in the Data Navigator both disappear.
Once the cursor is moved over the docked Data Navigator, the four-headed arrow docking icon in the center of the layout (i.e. Figure T12.11 below; red outline) disappears, and the four-headed arrow docking icon in the Data Navigator (Figure below T12.11; blue outline) reappears.
Figure T12.11 All Docking Icons When Moving Layout Navigator Initially
5.Release the mouse button when the Layout Navigator is over the right arrow of the four-headed arrow docking icon of the Data Navigator (Figure T12.12, red outline).
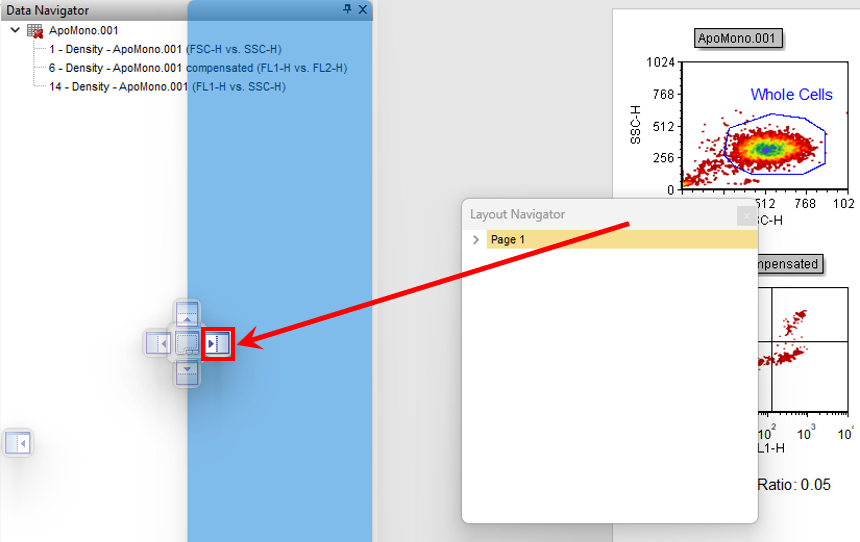
Figure T12.12 Docking Layout Navigator
The Layout Navigator is now docked to the right of the Data Navigator, on the left side of the layout (Figure T12.13). Note that it was docked inside the previous Data Navigator, i.e., both new docked windows take up the same amount of space as the Data Navigator did.
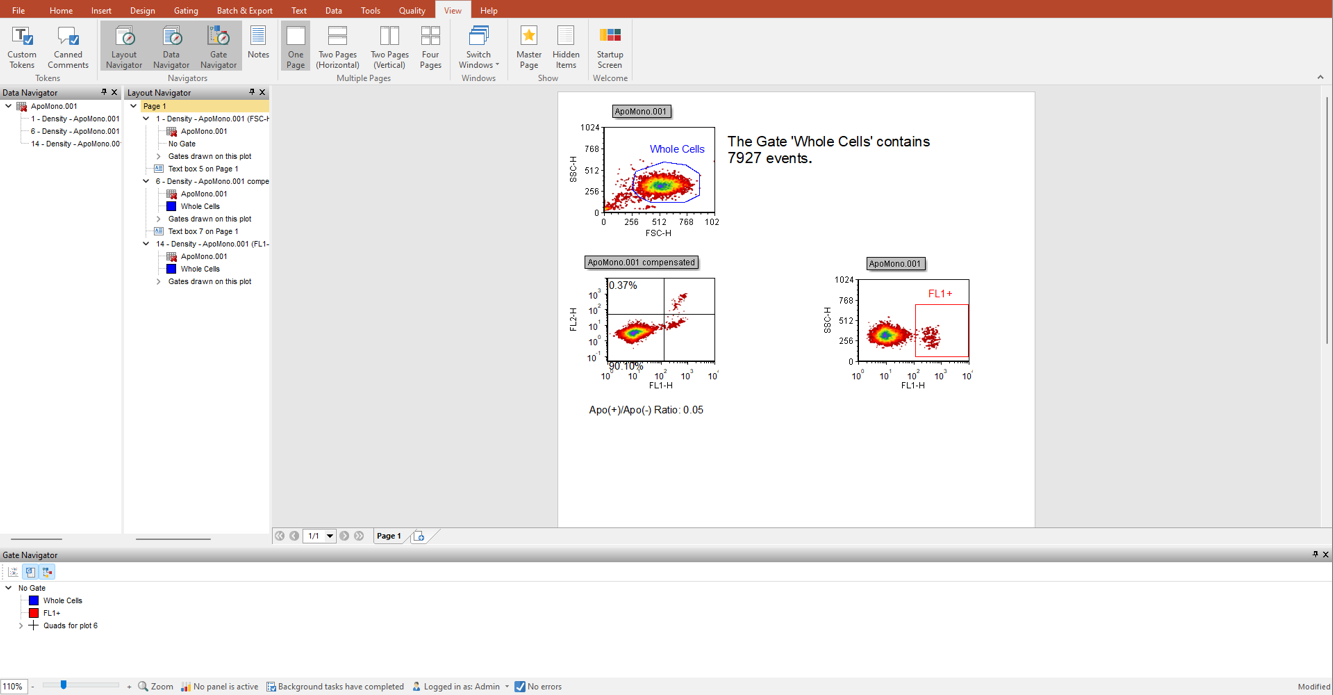
Figure T12.13 Layout Navigator Docked to Left of the Data Navigator
Note the commands on the ribbon for the windows docked within the layout are highlighted in a darker shade of grey (Figure T12.13). We now will dock the Custom Tokens window on the layout. However, this time we will dock it on top of the Layout Navigator.
7. Select the View tab→Tokens group→Custom Tokens command.
The Custom Tokens window appears on the layout.
8. Click and drag the Custom Tokens window by its title bar toward the left side of the layout.
9. Continue to hold down the left mouse button and drag the Custom Tokens window towards the middle of the docked Layout Navigator.
When the Custom Tokens is on top of the Layout Navigator, the docking zone sectors appear (Figure T12.14, red outline).
10. Release the mouse button when the cursor is on top of the central area of the docking icon on top of Layout Navigator (Figure T12.14 red arrow). You will know you are in the correct place because the blue rectangle indicates the proposed docking location.
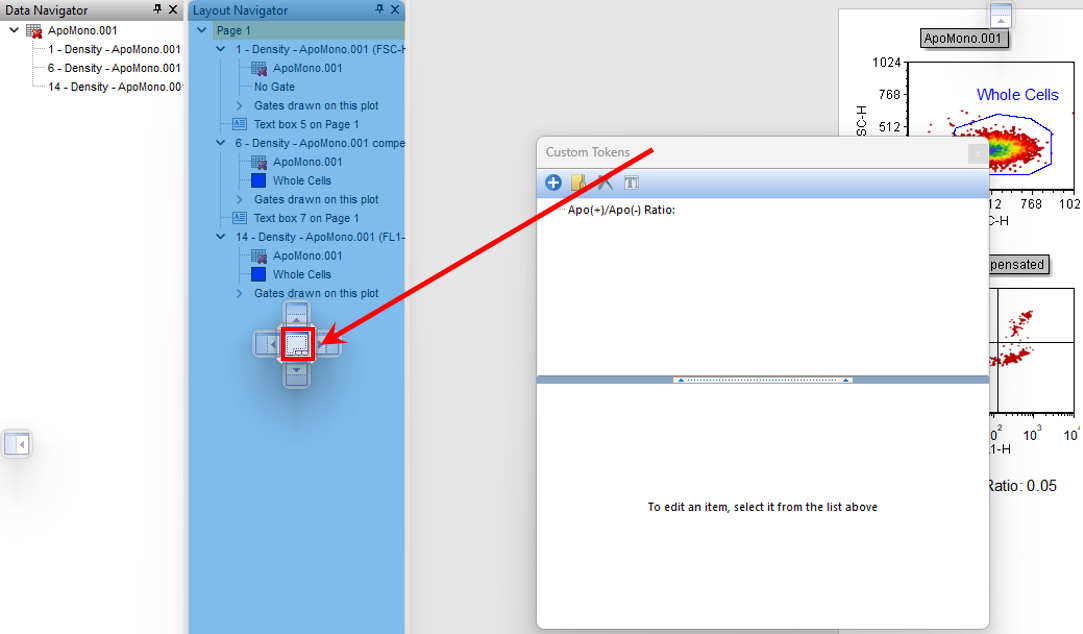
Figure T12.14 Docking Custom Tokens on top of the Layout Navigator
The Custom Tokens window is now docked on the left side of the layout, on top of the Layout Navigator (Figure T12.15). Notice that at the bottom of the docked Layout Navigator window there is a tab labeled Layout Navigator. To visualize the tabs for both docked windows, the docked windows can be resized to make them wider.
Figure T12.15 Custom Tokens Docked on top of the Layout Navigator
11. Place the mouse over the outer right border of the docked Custom Tokens.
12. Move the mouse slightly over the border until the resizing icon appears, a double-headed arrow.
13. Click and hold down the left mouse button; then, drag the border to the right (Figure T12.15, red arrow indicating direction).
14. Release the mouse button when the docked window is large enough to show the both tabs for Custom Tokens and Layout Navigator at the bottom (Figure T12.16, red outline).
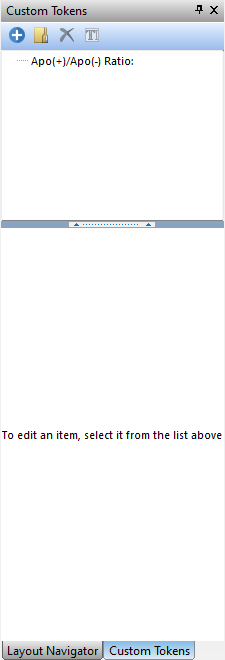
Figure T12.16 Custom Tokens and Layout Navigator Tabs
We now will explore the benefits of using Auto Hide when multiple windows are docked in one location.
15. Select the docked Data Navigator.
16. Click and drag the Data Navigator by its title bar to dock it on top of Custom Tokens.
The Data Navigator is now docked on top of both Custom Tokens and Layout Navigator (Figure T12.17). If you cannot see all three tabs, then resize the docked windows to make them wider.
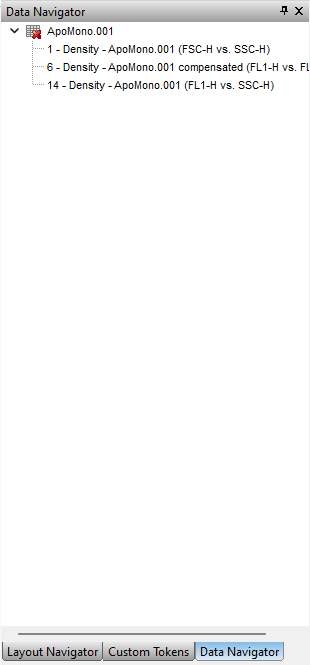
Figure T12.17 Data Navigator Docked on top of Custom Tokens and Layout Navigator
17. Click on the Auto Hide icon ![]() in the upper right corner of Data Navigator, which was demonstrated in previous section.
in the upper right corner of Data Navigator, which was demonstrated in previous section.
18. Move the cursor off and away from the docked Data Navigator.
The Auto Hide feature is now applied to all three docked windows, and only the tabs for the docked windows are visible (Figure T12.19). To see a docked window, move the cursor over the respective tab of the window you wish to see.

Figure T12.19 Docked Windows using Auto Hide Feature
In the last section, we will undock a window.
