Using Data Specific Gates
Assigning a gate to be Data Specific is accomplished in one of the following ways:
Option 1:
1. Click on the gate to convert to a Data Specific Gate (Figure 7.15 - Number 1) on a plot.
2. Click on the Gating tab of the Ribbon.
3. Select Create Gates→Data Specific Gates command (Figure below - Number 2).
Option 2:
1. Click on the gate to convert.
2. Hold down the Shift button and move the gate to the desired position. This action converts any existing gate to a Data Specific Gate.
Option 3:
1. Choose Always create a Data Specific Gate when moving this gate at the time of creating the gate. Whenever the gate is adjusted a new data specific gate will be created.
Option 4:
1. Choose Automatically create a Data Specific Gate when moving gates or quadrants in the User Options. Whenever a gate or quadrant is adjusted, a new data specific gate will be created.
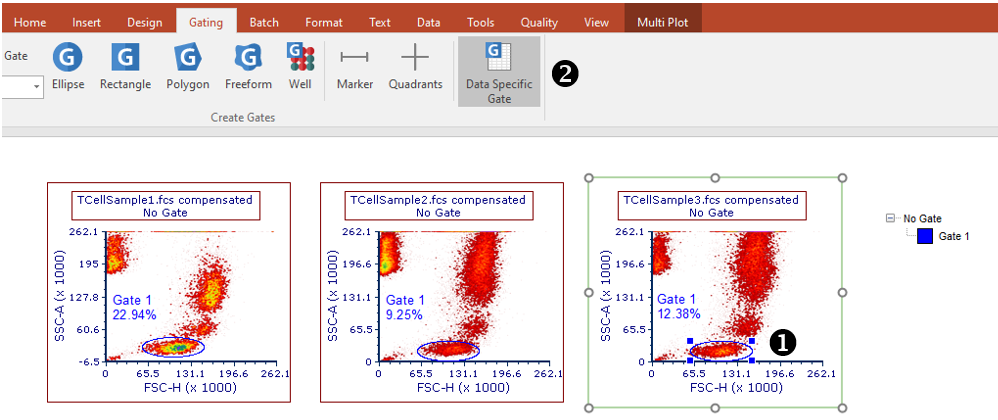
Figure 7.16- Data File Specific gates are created using the Data Specific Gate button from the Gating tab > Create Gates section.
The Gate Navigator will now reflect the presence of a Data Specific Gate for File 4 (ApoMono.004 compensated) (Figure 7.16).
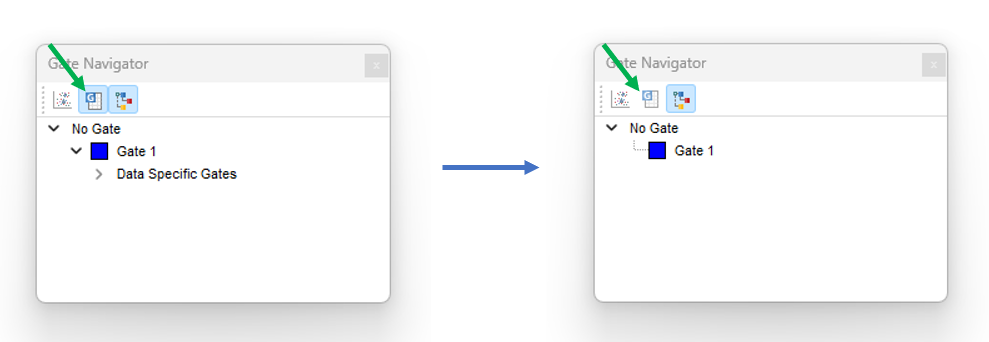
Figure 7.17 - The gate navigator before and after creating a data file specific gate on File 4 (ApoMono.004).
The shape and position of Gate 1 on File 4 can now be modified independently from the master gate (File 1 through File 3) Figure 7.17.

Figure 7.18 - An example of a data file specific gate for Gate 1 that has been made Data File Specific for File 4.
A Data Specific Gate can be reverted back to resemble the Master gate (i.e. to loose its data specificity) in one of three ways:
Option 1:
1. Click on the gate that need to be reverted to Master gate (Figure 7.18 - Number 1).
2. Click on the Gating tab of the Ribbon.
3. Select Create Gates→Data Specific Gates (Figure below - Number 2).

Figure 7.19 - DSG can be deleted using the Data Specific Gate button from the Gating > Create Gates ribbon bar.
Option 2:
1. Select the Data Specific Gate for the File in the Gate Navigator.
2. Press Delete.
Option 3:
4. Right click on the Data Specific Gate in the Gate Navigator.
5. Select Delete Data Specific Gate(s)(Figure 7.19).
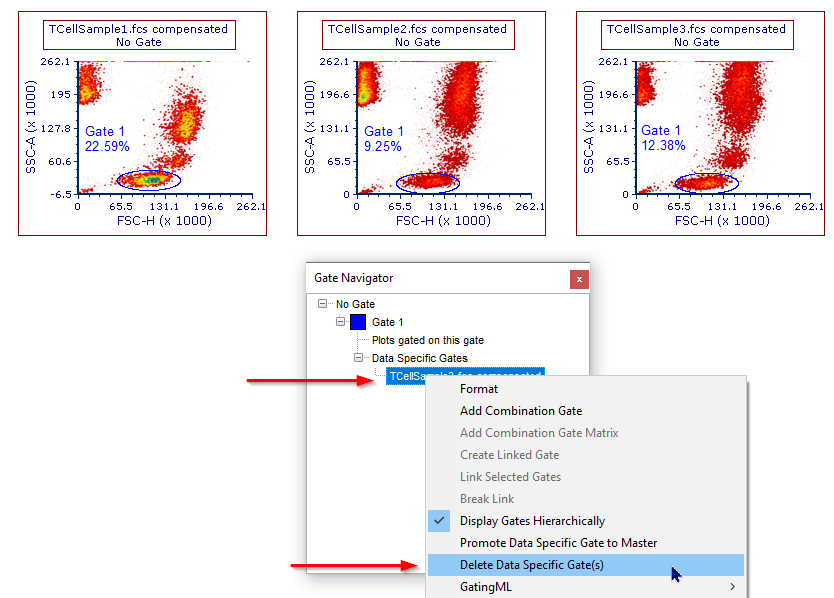
Figure 7.20 - A Data File Specific Gate can be removed using the right click menu in the Gate Navigator.
When a Data Specific Gate is deleted the Master Gate will be used on any files that had used the Data File Specific gate.
Promoting a Data Specific Gate to the Master Gate
A Data Specific Gate can be promoted to be the Master gate within the Gate Navigator:
1. Right click on the Data Specific Gate in the Gate Navigator.
2. Select Promote Data Specific Gate to Master from the right click menu (Figure 7.20).
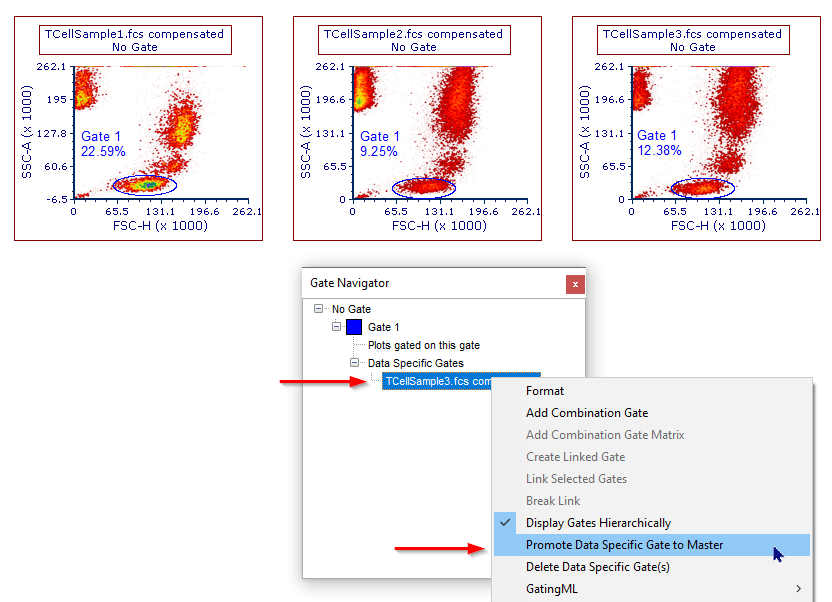
(Figure 7.21) - Selecting promote data specific gate to master gate in the gate navigator.
When promoting a Data Specific Gate to Master Gate:
•All of the files that used the original Master Gate will use the Data Specific Gate.
•The original Data Specific Gate is removed from the Gate Navigator (Figure 7.21) - left).
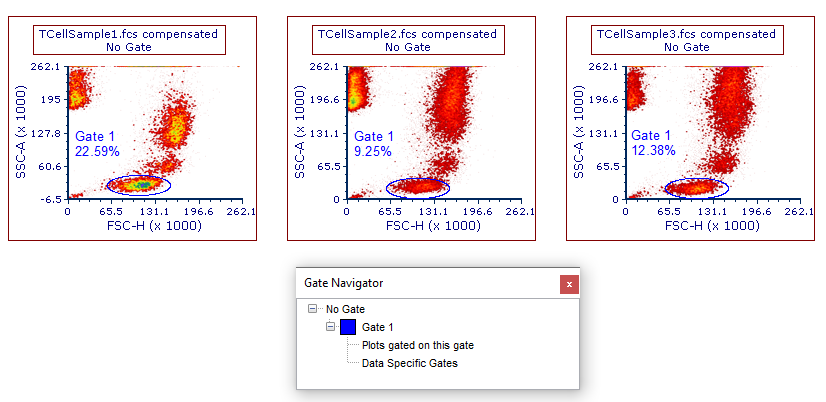
Figure 7.22 - A data specifc gate was promoted to a new master gate. Note the original data specific gate is no longer present.
