Adding Files to the Data List

Contents
Four methods can be used to add data sets to the Data List.
Note: The list of compatible data can be found in the Supported File Formats chapter.
1) Add files by dragging and dropping data files into the data list.
Drag data files from any location on your computer directly into the data list and release the mouse button.
2) Add files by dragging and dropping data files into the layout.
When data files are inserted in the layout by inserting a plot, the data file is automatically added to the data list. In addition, if the Data List is empty at the time the file is inserted in the layout, all other files that are located in the same folder will also be added to the data list.
3) Adding files without searching.
1. Access the Data List using the Batch (or Data)→Organize Data Sets→Data List command.
2.Click on the ![]() drop-down button, and select Add Data File (or directly click on the
drop-down button, and select Add Data File (or directly click on the ![]() ).
).
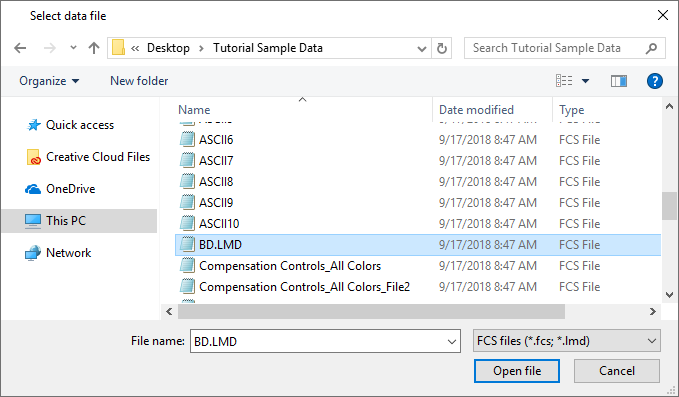
3.Either the Select Data File dialog (Figure 6.3; top pane) or the Advanced Open Data Dialog (Figure below; bottom pane) will open. Please refer to the Open Data Dialog chapter for more details on the two dialogs.
Note: In the Advanced Open Data Dialog, the ![]() button allows the user to reach the Select Data File dialog and thus to explore computer folders.
button allows the user to reach the Select Data File dialog and thus to explore computer folders.
 and the advanced \"Open Data File\" dialog (bottom).")
Figure 6.3 The standard "Select data file" dialog (top) and the advanced "Open Data File" dialog (bottom).
4.The Select Data File dialog (top pane in the previous Figure) allows the user to select the file type to open.
Click on the Options button at the bottom left of the Select Data File dialog to reveal the Enable drop-down menu (Figure 6.4; top pane) and then expand the Enable drop-down menu to access the compatible file types (Figure below; bottom pane).
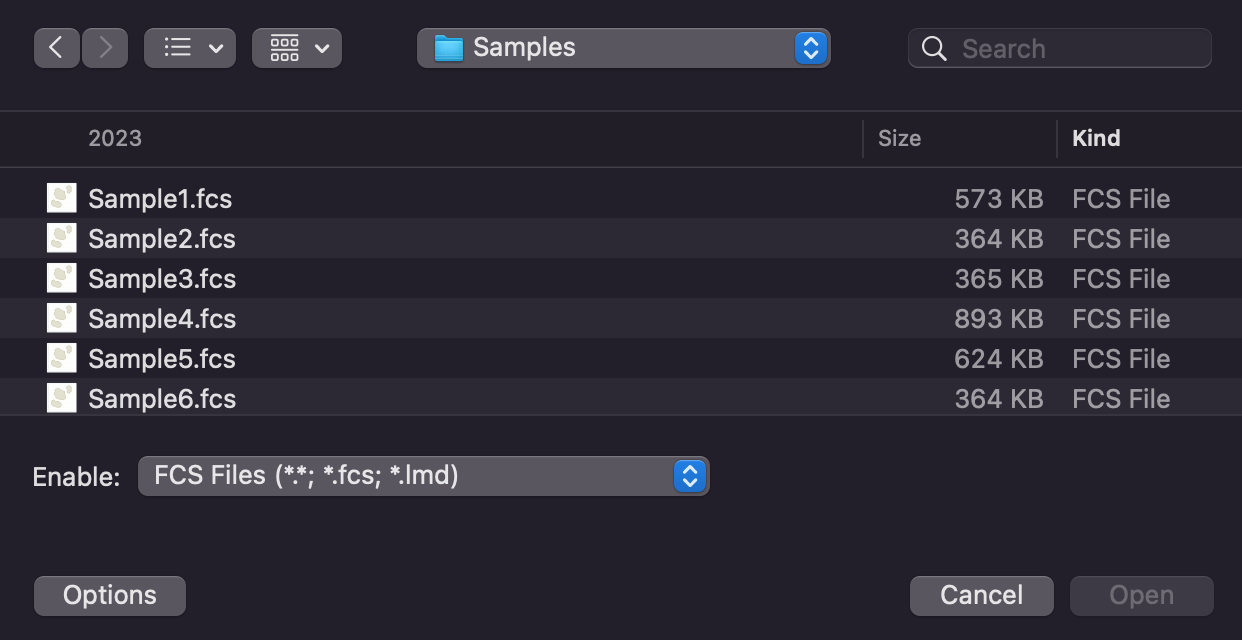

Figure 6.4 The "Options" button and the "Enable" dropdown menu allowing to select the file type of interest.
5.Once the file type of interest has been selected, select the appropriate files to open and click on the Open button to add the files to the Data List. The dialog allows you to add multiple files at once using standard Windows commands (e.g., Shift-Click or Cmd-Click to select multiple files at the same time).
Note: If you have set an active Panel, you can simply choose the first file/tube in your Panel, and FCS Express will ask if you want to automatically load the rest of the files/tubes in the Panel.
Additionally, Click on the drop-down ![]() button→Add Blank Tube to add a "placeholder" to the data list. Blank Tubes are particularly useful when using panels.
button→Add Blank Tube to add a "placeholder" to the data list. Blank Tubes are particularly useful when using panels.
4) Search for files or conditionally select files.
If you do not know where your data files are located, or if you wish to select files based on one or more conditions, you can perform a search.
Note: Since FCS Express Version 4, FCS Express is no longer limited to opening only FCS files. Therefore, to properly utilize functions which are related to Keywords, you must highlight the appropriate data set/file (so that FCS Express knows which type of Keywords to display) before doing a keyword search.
1. Access the Data List using the Batch (or Data)→Organize Data Sets→Data List command.
2. Click on the Search button ![]() to bring up the Find Data Files dialog (Figure 6.5).
to bring up the Find Data Files dialog (Figure 6.5).

Figure 6.5 Find Data Files Dialog
Select one or more of the three tabs at the top of the Find Data Files dialog to set search criteria for finding the files you want to add to the Data List. All the search criteria work together, so you can select any combination before clicking the Find button.
•On the Name & Location tab, click the Browse button, navigate to the directory to search, then press the Find button. Note: Setting an appropriate directory on the Name & Location tab first will make searches faster even if you are using the date or keyword conditions below.
•To search for files based on their date, click on the Date tab and enter the search criteria.
•To search for files based on the value of a keyword, select the Conditions tab. (Recall that you must highlight/select a data set/file in the Data List for Keyword searches to work properly.) By default, there are no conditions set, so click the Add Condition button. A new line appears in the table, and the first column will be unavailable. Click on the button in the Keyword column and select a keyword (e.g., $TOT for total number of events) from the Please select a keyword dialog. You can also type in the keyword within the field. In the Relation and Value columns, select the keyword range to search. For example, to search for files with more than 20000 events, select > (for less than) in the Relation column, then enter 20000 in the Value column.
•To search for files based on more than one keyword, click on the Add Condition button again. This time, select the Operator from the first column. The Operator default is AND to specify both keyword conditions must be met. Otherwise, select the operator OR to specify either keyword condition may be met. After selecting the operator, enter the Keyword, Relation and Value options as before.
When you are ready to run the search, click on the Find button. Remember that all of the conditions work together, so you can select a starting folder, date criteria, and keyword conditions before starting the search.
While FCS Express is finding the files that match your search requirements, the window will expand to include the Search Results field. As files are found, they will be added to that field. To halt the search before it is complete, click on the Stop button. Figure 6.6 shows a search for all files within a specified directory with greater than 20,000 cells acquired.

Figure 6.6 Search Files by Keyword
Once all the files have been found, add the files you want to use in the Data List. To add files individually, click on a file name to select it. To select more files, press Cmd (or Shift) while you click on a file name, then press OK. Once the appropriate files have been highlighted, press the Down Arrow button. To remove files from entry into the Data List, select the files to be removed and click the Up Arrow button. When you have finished choosing files for the Data List, press OK.
If you wish to perform a second search, first add the files from the current search, then perform subsequent searches. When files are added to the Data List and an active Panel is set, each group of files (representing the tubes of the Panel) will appear in alternating colors. This makes it easier to distinguish between the different files of a Panel.