Displaying SOP Information and SOP tokens
Once you have created an SOP in FCS Express, you may want to display the details on your layout pages.
SOP's details and status information can easily be displayed using the Insert SOP table when right clicking in any text box or by using tokens.
An SOP token can display the following kinds of information:
SOP Token Type |
Explanation |
Number of SOP steps |
The total number of steps in an SOP |
Current SOP step name |
The name of the currently active step when running SOP as defined by the user |
Current SOP step internal ID |
The internal ID of the currently active step when running SOP |
Current SOP step order number |
The step order number when running SOP |
Current SOP step description |
The step description when running SOP |
Current SOP step completion date |
The last date the current SOP step was completed on. |
SOP step name |
The name of the selected step from the Create SOP Token dialog |
SOP step internal ID |
The internal ID of the selected step from the Create SOP Token dialog |
SOP step order number |
The step order number of the selected step from the Create SOP Token dialog |
SOP step description |
The step description of the selected step from the Create SOP Token dialog |
SOP step completion date |
The last date the selected step from the Create SOP Token dialog was completed on |
To display the SOP tokens, you need to first create a text box. There are two ways to insert SOP tokens into the text box:
Using the SOP table
1. Right-click in the text box.
2. Select Insert SOP Table.
A table will be created inside the text box, as shown below (Figure 10.8).
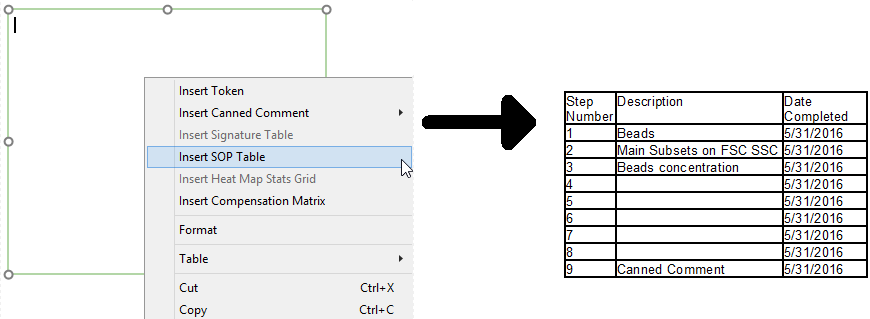
Figure 10.7 Inserting the SOP Table
Using individual SOP tokens
1. Right-click in a text box.
2. Select Insert Token. The Insert a Token window will appear (Figure 10.9).
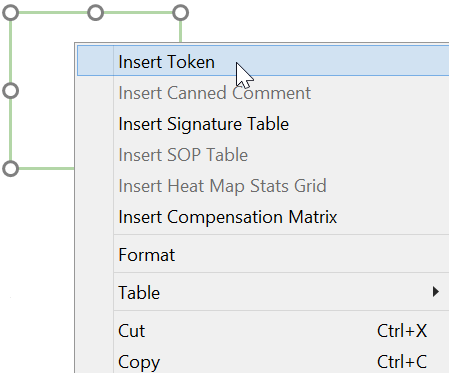
Figure 10.8 Insert Individual SOP tokens
3. Click on the SOP node.
4. Select the type of SOP information you want to display.
5. Press Insert (in this example, we will choose SOP step name) (Figure 10.10). The Create SOP token dialog will appear. Note: if the SOP is not running when any of the follow tokens are inserted, "SOP is not running" will be the token value's display text in the text box: Current SOP step name, Current SOP step internal ID, Current SOP step order number, Current SOP step description, and Current SOP step completion date.
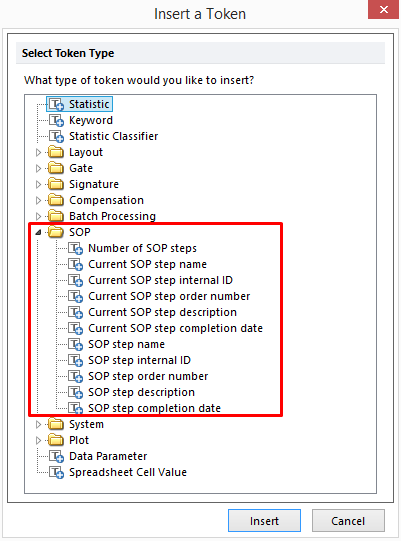
Figure 10.9 SOP Tokens
6. Choose the SOP Information category in the Create SOP Token dialog.
7. Select the Linked SOP step name from Token to Display drop down list.
8. Choose the step of interest from the Sop Step drop down list under Linked SOP Step (Figure 10.11).
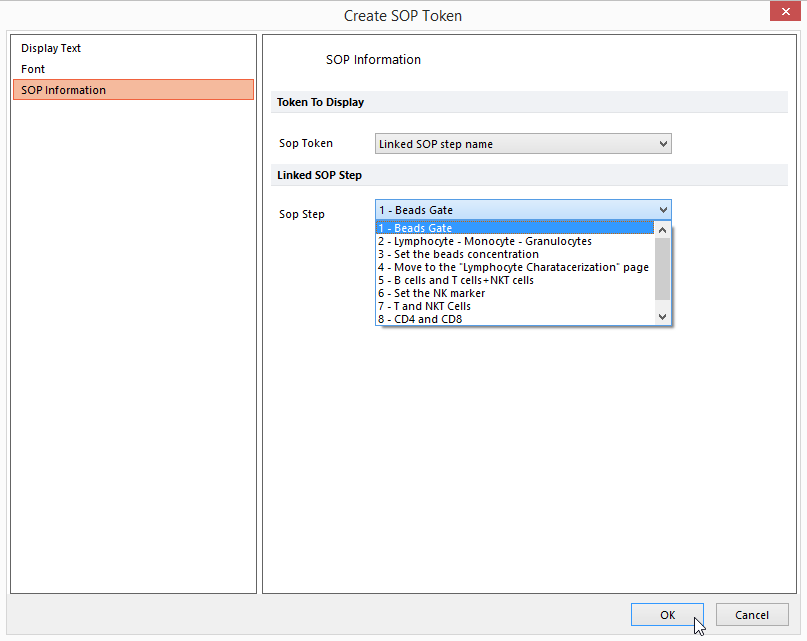
Figure 10.10 SOP Token Editor
9. Click OK. The token will appear in the text box (Figure 10.12).
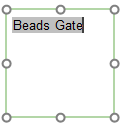
Figure 10.11 Text box with Inserted Token
As with other tokens, you can change the Common Token Properties of Display Text and Font of individual SOP tokens in the SOP Token Editor.
