Docking
Many of the functional windows within FCS Express are dockable. This means that they can be embedded within the layout and becoming a more permanent fixture within the layout. Docked windows can also be Pinned, which enables an Auto Hide feature for that docked window.
The docking feature allows you to place any of the Navigator windows (Layout, Data and Gate), the Token windows (Custom Token, Canned Comments, and Alerts), and the Data List window, onto the layout and then "dock" the window, or windows, to a specific fixed location on the outside of the layout page. Docking has many powerful features which we will explore in this tutorial.
Note: We are going to open a lot of interesting Navigators in this tutorial, but will only focus on the docking functionality. For more information on how these Navigators work, please see the tutorials on the Layout Navigator, Data Navigator, and Gate Navigator.
In the course of this example, we will:
•Learn how to dock a window.
•Learn how to use the many docking features.
•Learn how to use docking features with multiple windows.
•Learn how to undock a window.
To Dock a window:
1.Select File tab→Open.
2.Open the layout Docking.fey found in the Tutorial Sample Data folder.
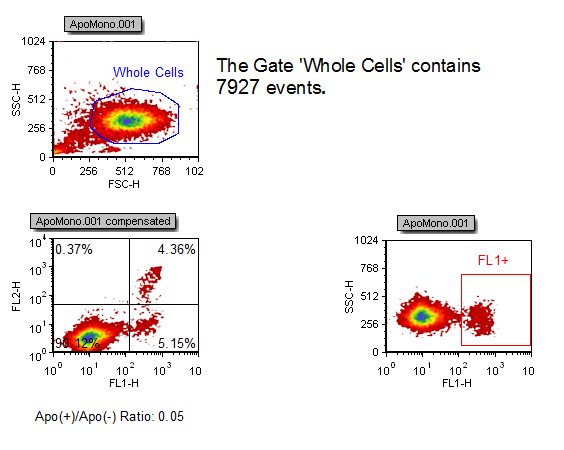
The following layout will appear, shown in Figure T12.1. This layout is similar to the one used in the Tokens tutorial.

Figure T12.1 Docking Layout
3.Select the View tab→Navigators→Gate Navigator command  .
.
The Gate Navigator window will appear on the layout.
4.Place the mouse on the top title bar of the Gate Navigator window.
5.Click and hold the left mouse button. While holding the left mouse button, move the mouse. Continue holding the mouse button and drag the Gate Navigator towards the central docking icon (Figure T12.3, red outline).
Figure T12.3 Docking Zone Sectros in the Center of the Layout
6. Move the Gate Navigator towards the right arrow of the docking arrow.
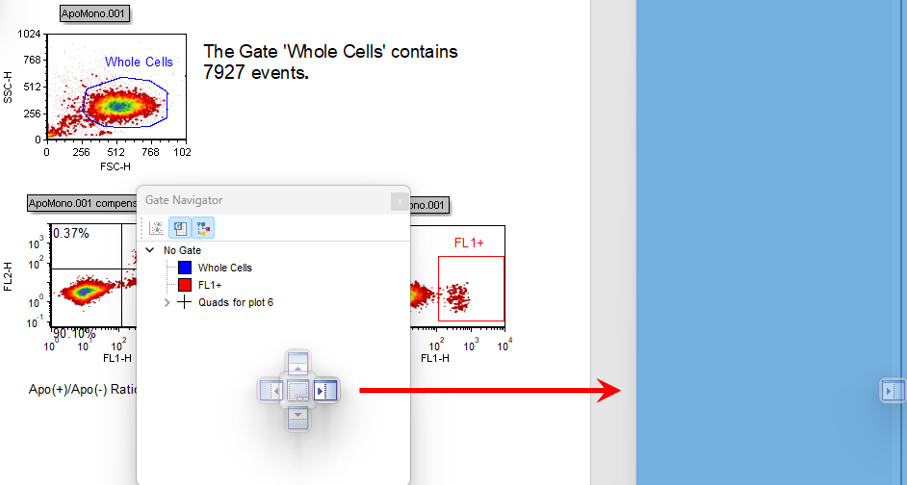
7. Continue to hold down the mouse button and place the cursor over the right arrow (Figure T12.4, red outline). When cursor is on sector icon, a blue pane, representing the corresponding side of the layout to which the floating window will be docked, will appear (Figure T12.4, red arrow).

Figure T12.4 Docking to Right Preview Pane
8. While holding mouse button, move to left docking zone sector and release mouse button. Gate Navigator will be docked to right side of layout.
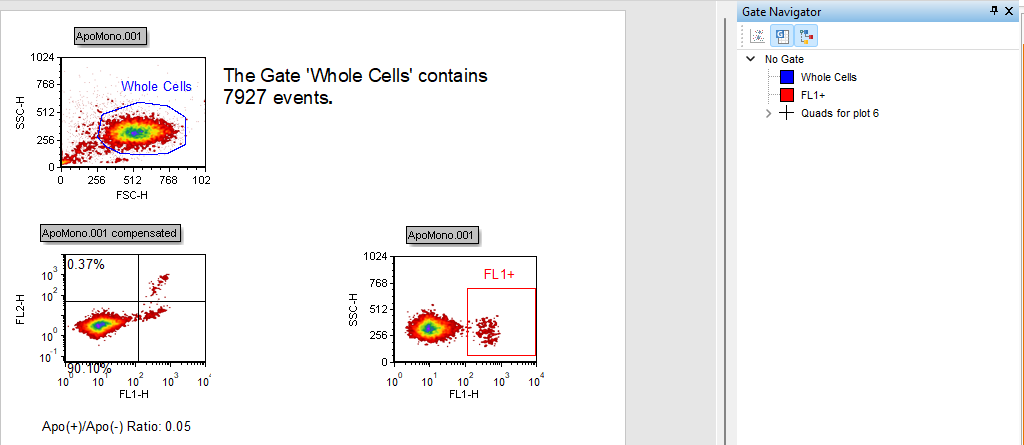
The Gate Navigator is docked on the right side of the layout (Figure T12.5).

Figure T12.5 Gate Navigator Docked on the Right Side of the Layout
In the next section, we will learn the features of a docked window.
