Working with Panels
The primary benefit of a panel is that it allows you to change the data on your layout simply by changing the Data List. For example, on Day 1 you analyze your tubes using FCS Express, creating a plot for each tube. On Day 2, you need to load new data into the same plots that you used on Day 1. Once you set up the Panel and the Data List correctly, the layout from Day 1 can be modified to show the data from Day 2, simply by loading the Day 2 data into the Data List.
The following example will guide you through creating a Panel and taking advantage of it using the Data List.
1.Select the Data→Organize Data Sets→Panels command. The Panel Information dialog, shown in Figure 6.23, will appear.
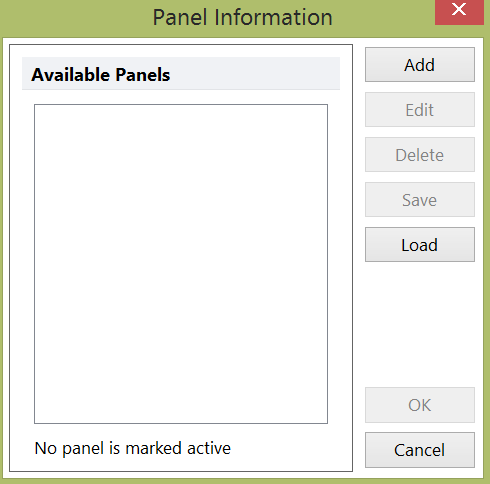
Figure 6.22 Panel Information Dialog
2.Click on the Add button to create a blank Panel. This will bring up the Add Panel dialog (Figure 6.24).
3.Fill in the Panel Information:
![]() Enter a name in the Panel Name field
Enter a name in the Panel Name field
![]() Select the number of tubes in the panel by clicking on the arrows to the right of Number of Tubes. For each tube added, a blank line appears in the table.
Select the number of tubes in the panel by clicking on the arrows to the right of Number of Tubes. For each tube added, a blank line appears in the table.
![]() Give each tube a Name (optional), by typing the name into the Name column.
Give each tube a Name (optional), by typing the name into the Name column.
![]() Enter the Number of Stationary Controls (optional). Stationary Controls will be loaded along with regular Tubes in the Panel, but will not change when changing Iterations.
Enter the Number of Stationary Controls (optional). Stationary Controls will be loaded along with regular Tubes in the Panel, but will not change when changing Iterations.
![]() Give each Stationary Control Tube a Name (optional), by typing the name into the Name column.
Give each Stationary Control Tube a Name (optional), by typing the name into the Name column.
![]() Click OK when you have finished setting up the panel. You will be returned to the Panel Information dialog, where you will see the newly created panel. Panel information is saved with the layout. However, you can save your panel for use in other layouts. The Panel Information dialog allows you to Edit, Delete, Save, and Load panels.
Click OK when you have finished setting up the panel. You will be returned to the Panel Information dialog, where you will see the newly created panel. Panel information is saved with the layout. However, you can save your panel for use in other layouts. The Panel Information dialog allows you to Edit, Delete, Save, and Load panels.
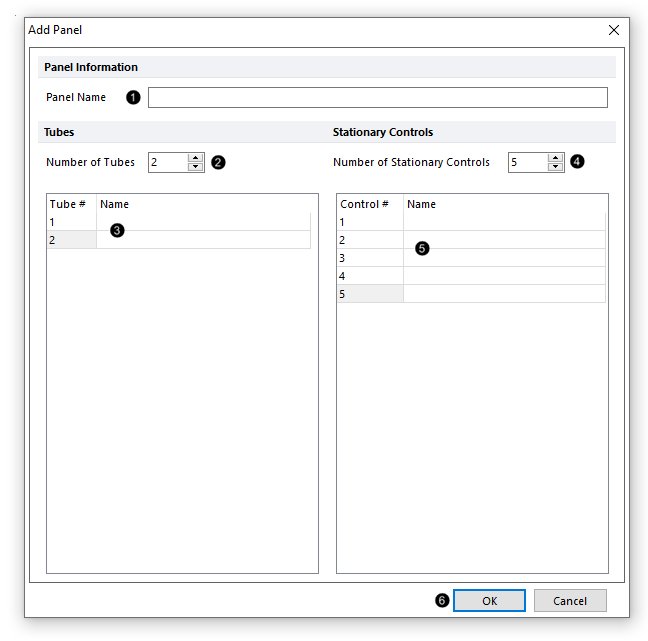
Figure 6.23 Setting up the Panel Tubes
4. Since each layout can have only one active panel, verify that the panel that you want to use is marked active (the box to the left will be checked).
5. Click OK to continue. Now create plots on your layout and populate them with data. The Data List will automatically be populated with the data files in the current directory.
6. Use the Data→Organize Data Sets→Data List command to bring up the Data List window. The first column shows the tubes from the Panel and the second column shows each tube's associated data file. Notice how the data files are grouped into the panel automatically. If a tube is associated with the wrong data file, you can reorder the files using the Up and Down buttons (see green-highlighted Up and Down buttons in the figure below).

Example of Panel with 2-tube iterations.
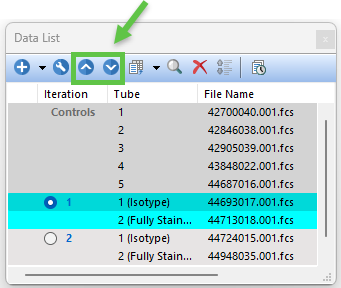
Example of Panel with 5 Stationary controls and 2-tube iterations.
To use the Data List in conjunction with the panel to control the data files in the plots in your layout, do the following:
1. Remove the data files from the Data List by selecting all the files and clicking Remove.
2. Click OK. The plots which previously displayed data are now empty.
3. Return to the Data List, and add a new set of data files. To do this, click on Add and select the data files to be added.
4. Click OK. The previously empty plots are now displaying data from their associated data files.
If you have a Panel applied, and are adding files to the file list, you do not have to select all the files that you want to add. You can select the first file that you wish to add, and FCS Express will attempt to determine how many additional files to include (Figure 6.25).
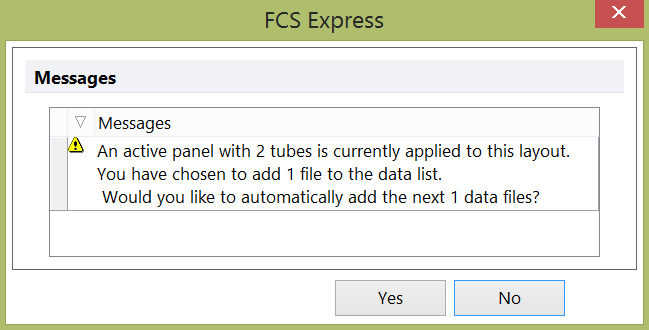
Figure 6.24 Automatically Populating a Panel
Additionally, if you would like to add data file(s) to the data list without adding all tubes for the panel you may select the option to Add Blank Tube from the add data file drop down icon (Figure 6.26)
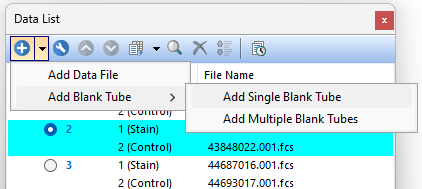
Figure 6.25 Adding a blank tube to the data list.
When a Blank Tube is added to the data list it will appear in your list of files with the name "Blank Tube" (Figure 6.27). Any number of Blank Tubes may be added.
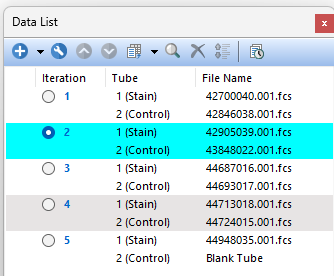
Figure 6.26 A blank tube was added to the data list to complete the panel.
