Docking Features (Multiple Windows)
We will now open more Navigators and the Custom Tokens window, and dock them to demonstrate the features of docking with multiple windows. Please refer to the beginning of this tutorial for details on docking.
| 1. | Select the View→Navigators→Data Navigator command. |
The Data Navigator window will appear on the layout.
| 2. | Dock the Data Navigator window to the left of the layout. |
The layout now has two windows docked, Gate Navigator on the bottom and Data Navigator on the left, as shown in Figure T11.12.
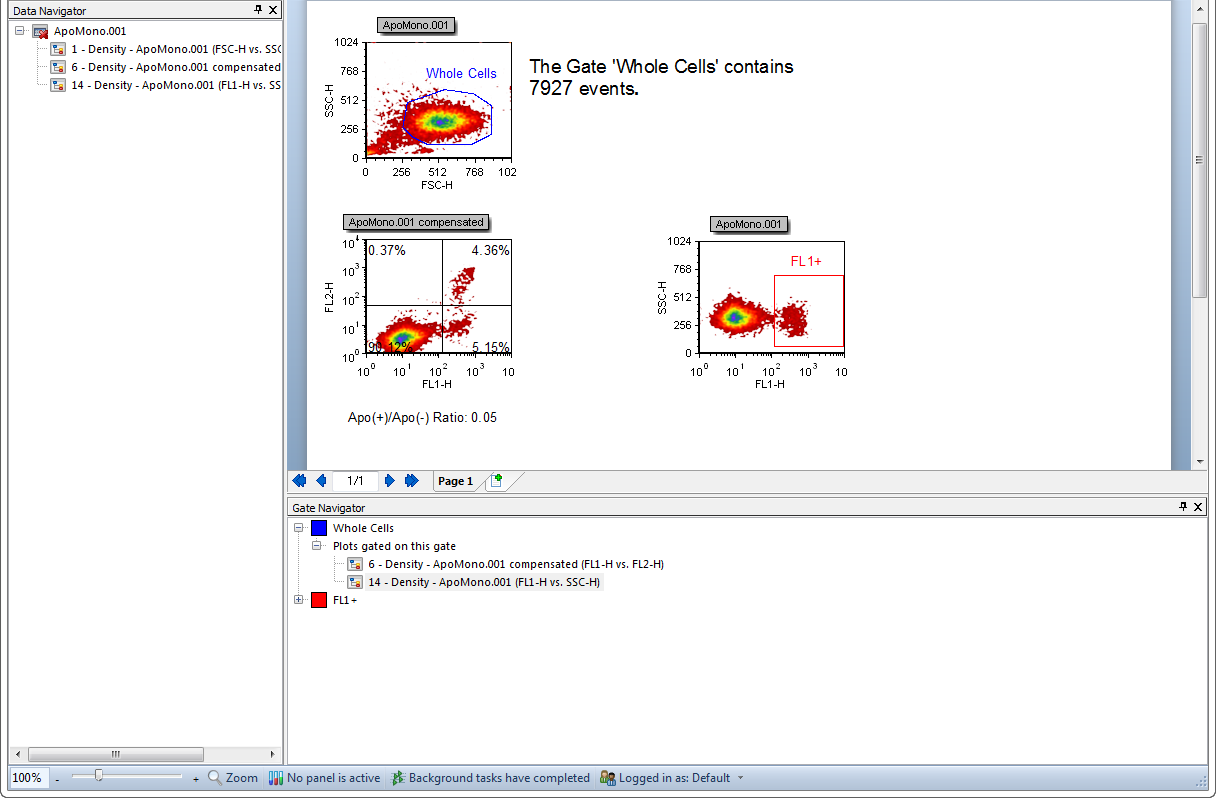
Figure T11.12 Layout with Gate Navigator and Data Navigator Docked
| 3. | Select the View→Navigators→Layout Navigator command. |
The Layout Navigator appears on the layout. We will now dock the Layout Navigator to the left side of the layout.
| 4. | Drag the Layout Navigator toward the left side of the layout. |
When you first start to drag the Layout Navigator, the four-headed arrow and the single arrow docking icons, appear at all the possible docking locations (Figure T11.13). The four-headed arrows are indicated by red circles, and the single arrows by blue circles in Figure T11.13. Once you begin moving the Layout Navigator, the docking icons fade away and the only docking icons visible are those that indicate the current docking site. The four-headed arrow docking icon will only appear within a specific docking site and indicates the possible docking locations at that site. The single docking arrows, indicated by the blue circles in Figure T11.13, always appear to the left, bottom, right, and top of the layout page and indicate that these docking sites are always available.
Figure T11.13 Initial Docking Icons
As you move the Layout Navigator towards the left side of the layout, the four-headed arrow docking icon appears at the left docking site, indicated by the red circle in Figure T11.14. The four-headed arrow docking icon indicates the possible docking locations for the Layout Navigator. The single docking arrow on the far left indicates that the window can be docked all the way to the left of the currently docked Data Navigator.
| 5. | Continue to hold down the left mouse button and drag the Layout Navigator towards the docking icon with the four arrows on the left side of the layout, circled in red in Figure T11.14. |
| 6. | Release the mouse button when the Layout Navigator is over the right arrow, indicated by the blue circle in Figure T11.14. |
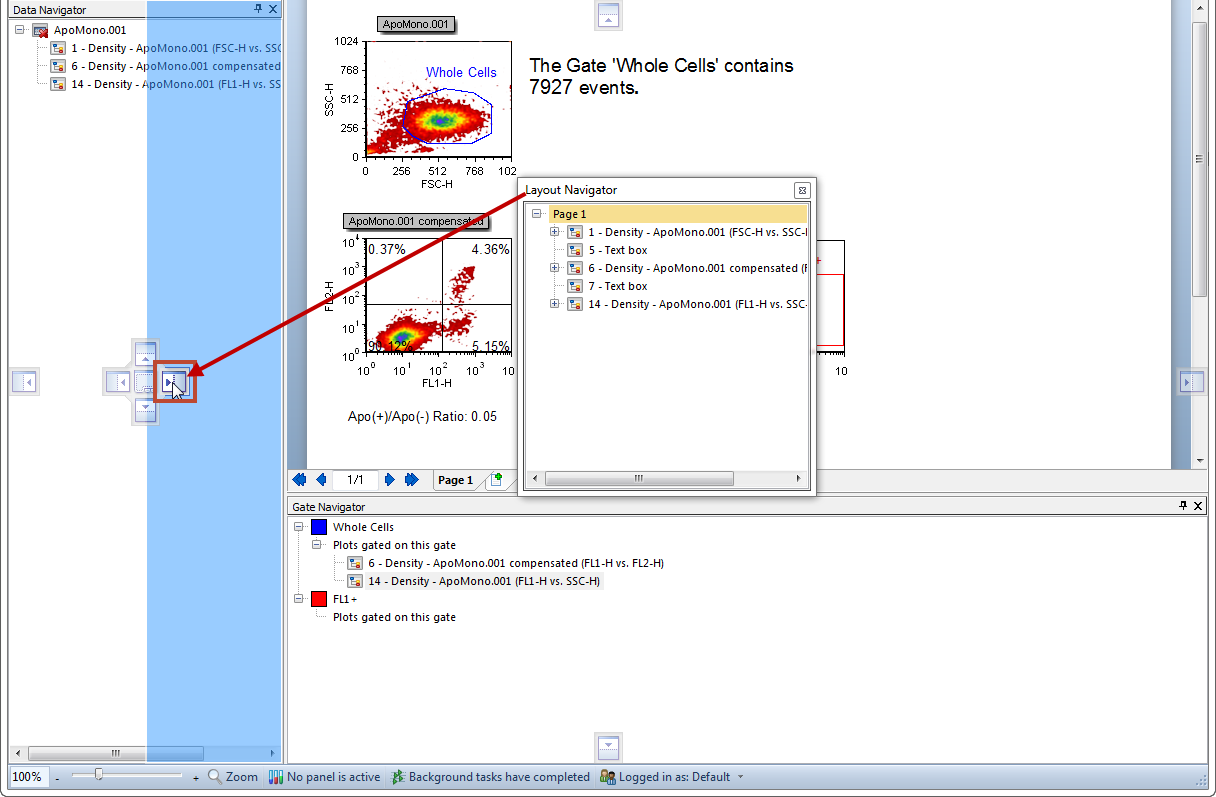
Figure T11.14 Docking Layout Navigator
The Layout Navigator is now docked to the right of the Data Navigator, on the left side of the layout, as shown by Figure T11.15. Note that it was docked inside the previous Data Navigator, i.e., both new docked windows take up the same amount of space as the Data Navigator did.
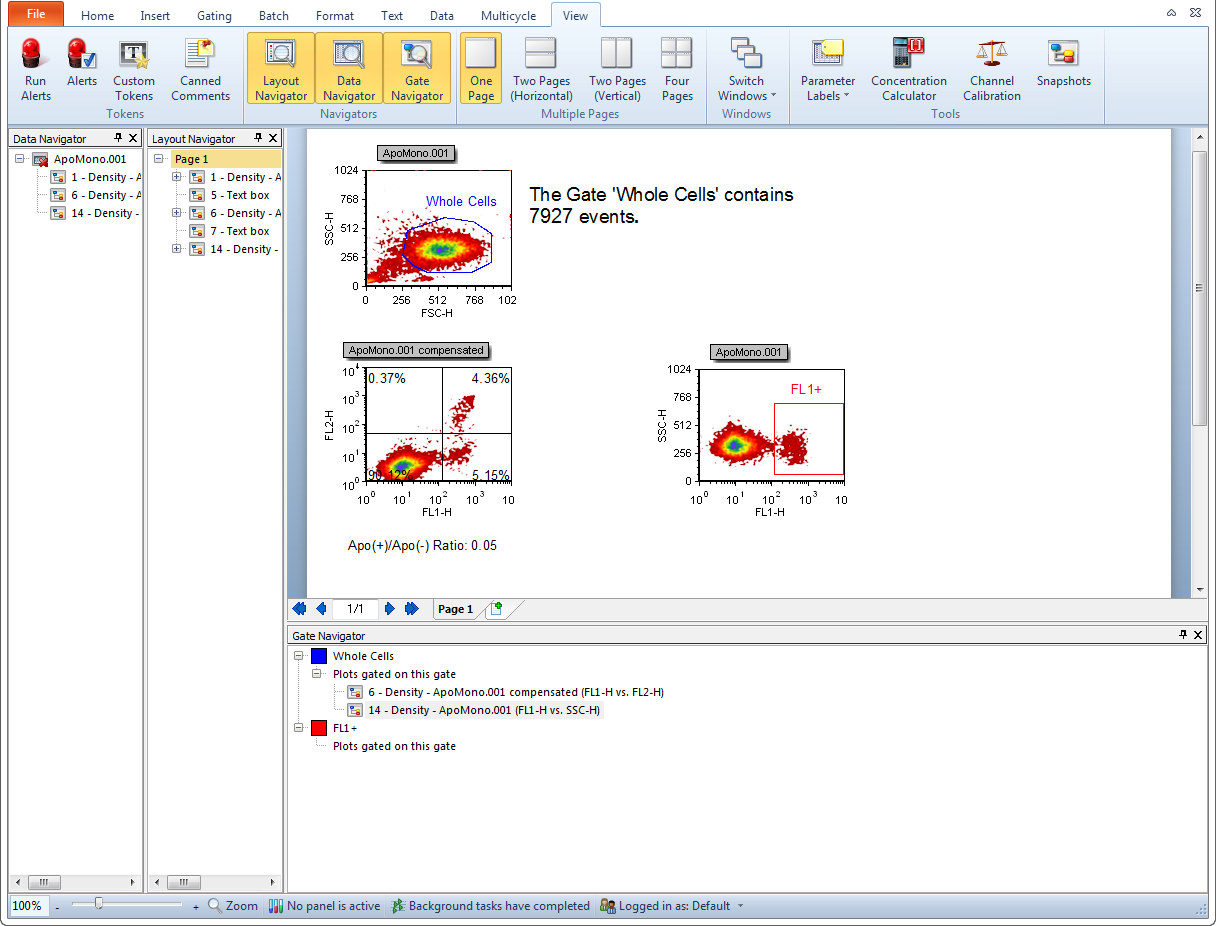
Figure T11.15 Layout Navigator Docked to Right of the Data Navigator
Note that the windows docked on the layout are highlighted on the ribbon (Figure 15). We will now dock the Custom Tokens window on the layout. However, this time we will dock it on top of the Layout Navigator.
| 7. | Select the View→Tokens→Custom Tokens command. |
The Custom Tokens window appears on the layout.
| 8. | Drag the Custom Tokens towards the left side of the layout. |
| 9. | Continue to hold down the left mouse button and drag the Custom Tokens window towards the middle of the docked Layout Navigator. |
When the Custom Tokens is on top of the Layout Navigator the four-headed arrows docking icon appears (Figure T11.16).
| 10. | Release the mouse button when the cursor is on top of the central area of the docking icon on top of Layout Navigator, indicated by the cursor in Figure T11.16. |
You will know you are in the correct place because the blue rectangle indicates the proposed docking location.
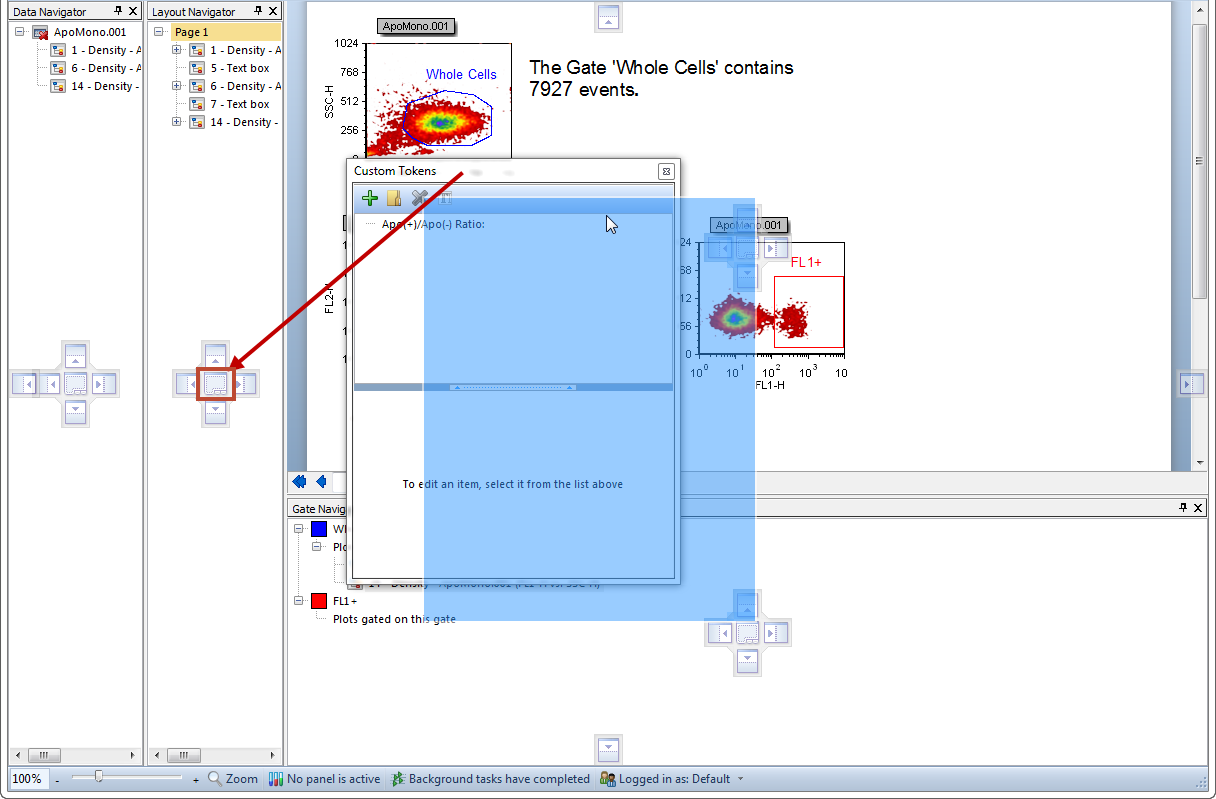
Figure T11.16 Docking Custom Tokens on top of the Layout Navigator
The Custom Tokens window is now docked on the left side of the layout, on top of the Layout Navigator, as shown in Figure T11.17. Notice that at the bottom of the docked Custom Tokens window there is a tab labeled Custom Tokens. However, we want to see the tabs for both docked windows so we will now resize the docked windows to make them larger.
Figure T11.17 Custom Tokens Docked on top of the Layout Navigator
| 11. | Place the mouse over the outer right border of the docked Custom Tokens. |
| 12. | Move the mouse slightly over the border until the resizing icon appears, indicated by the red circle in Figure T11.17. |
| 13. | Press and hold down the left mouse button and continue to hold it while dragging the border to the right. |
| 14. | Release the mouse button when the docked window is large enough to show the tabs for both Custom Tokens and Layout Navigator at the bottom (Figure T11.18). |
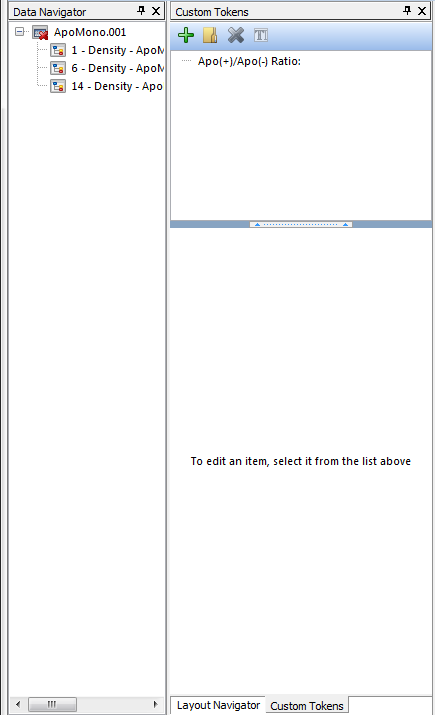
Figure T11.18 Custom Tokens and Layout Navigator Tabs
We will now explore the benefits of using Auto Hide when multiple windows are docked in one location.
| 15. | Select the docked Data Navigator. |
| 16. | Drag the Data Navigator and dock it on top of Custom Tokens. |
The Data Navigator is now docked on top of both Custom Tokens and Layout Navigator, as shown in Figure T11.19. If you can’t see all three tabs, then resize the docked windows to make them wider.
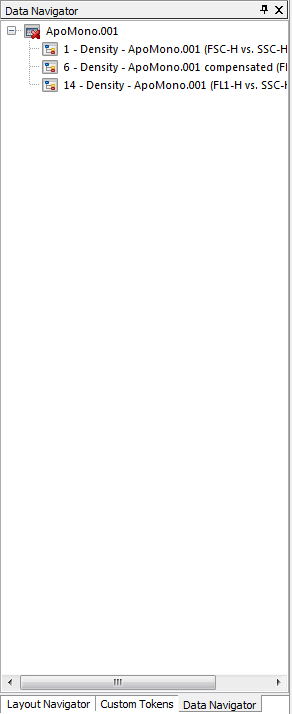
Figure T11.19 Data Navigator Docked on top of Custom Tokens and Layout Navigator
| 17. | Click on the Auto Hide icon in the upper right corner of Data Navigator, previously shown in Figure T11.9. |
| 18. | Move the cursor off the docked Data Navigator. |
The Auto Hide feature is now applied to all three docked windows, and only the tabs for the docked windows are visible, as shown in Figure T11.20. To see a docked window, move the cursor over the respective tab of the window you wish to see.

Figure T11.20 Docked Windows using Auto Hide Feature
In the last section, we will undock a window.
