Gate View Object
The Gate View object is an interactive legend of all the gates in your layout. As an object, the Gate View will be printed and displayed like any other object. For additional object properties, see Formatting Options Shared by All Objects.
To insert a Gate View, select the Insert tab→General→Gate View command.
Many of the actions can be performed directly from the Gate View as follows:
| • | To delete a gate from the entire layout, select the gate in the Gate View and press the Delete key. |
| • | To rename a gate, select the gate in the Gate View and press F2. Type in the new gate name and press Enter. |
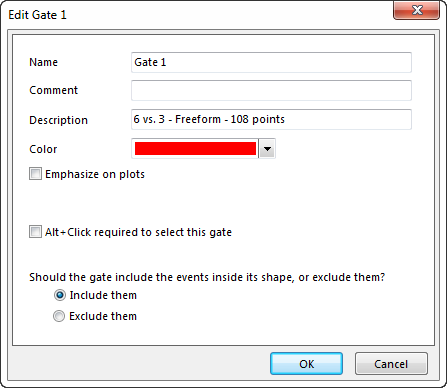
| • | To edit all of the gate properties, double-click on the gate in the Gate View to bring up the Edit Gate dialog (Figure 9.10). From the dialog you can change the gate Name, add a Comment, change the Description, change the Color*, Emphasize the gated events on plots, Include or Exclude the events inside the gates shape, and, if applicable, break the link to a quadrant or gate. If you check Alt+Click required to select this gate, then clicking on the gate will not select the gate unless the Alt key is being held. This will prevent accidental changing of the gate vertices. |
| • | To rearrange the hierarchy of the gates, drag and drop the gates within the Gate View. For example, to make a gate a child gate of another gate, drag the child gate onto the parent gate. Also note that a gate may be placed in a specific position in the hierarchy at the time of creation using the Parent Gate drop down. |
| • | To gate a plot on a gate, drag the gate from the Gate View onto that plot. |

Figure 9.10 Edit Gate Dialog
* Note: If Gate Color has been changed, text color within the Gate Text Box will no longer match. To recreate this text with the current Gate Color, right-click on the plot and select Recreate Gate Text Boxes from the pop-up menu.
