Dropdown Custom Tokens
The Dropdown list Display type allows you to create a list of comma-separated values to appear in a dropdown list within the layout. To create a Dropdown list:
1. Create a new custom token with or without text.
2. Drag and drop the custom token from the Custom Token window onto the layout to insert it.
3. Double-click the custom token in the layout to open the Edit custom token dialog.
4. Change the Display type to Dropdown list.
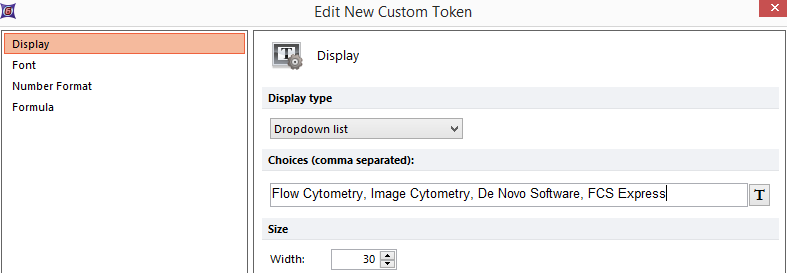
5. Enter a list of comma-separated choices for the list in the text field (alternatively, choose to use any token values by clicking on the ![]() button) (Figure 19.69).
button) (Figure 19.69).

Figure 19.69 Enter a list of choices separated by a comma to be displayed in the dropdown list.
6. Click OK.
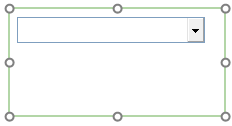
An empty box will appear within the text box in the layout where the token was inserted (Figure 19.70).

Figure 19.70 An empty dropdown list box appears in the layout where the token was originally inserted.
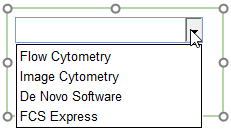
7. Click on the dropdown arrow to reveal the contents of the Dropdown list (Figure 19.71).

Figure 19.71 Once the dropdown arrow is pressed a list of the comma separated choice that were entered will appear.
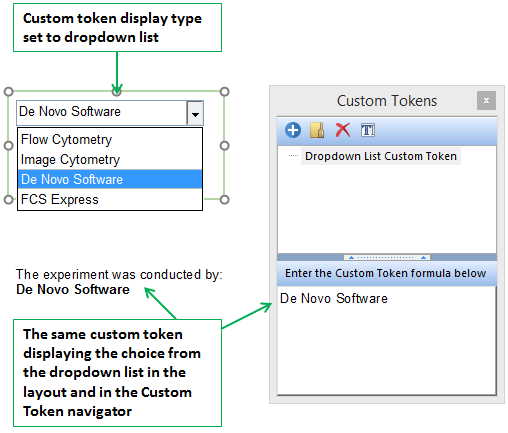
8. Click on any of the choices in the Dropdown list to fill the box (Figure 19.72).

Figure 19.72 The dropdown list after the "De Novo Software" choice was selected.
Once a choice has been selected, the Custom Token value in the Custom Tokens window will reflect the choice made in the Dropdown list. The Custom Token may then be dragged and dropped from the Custom Tokens window to any other location in the layout. When dragging and dropping the token from the Custom Tokens window, the default display type of "label" will be used, thus displaying only the value chosen in the Dropdown list. When the value is updated via the Dropdown list the custom token will update wherever displayed. (Figure 19.73)

Figure 19.73 The value of "De Novo Software" was chosen from the dropdown list. The value was updated in the Custom Token navigator and also in the secondary text box containing the token.
