Grouping and Filtering Reports
Reports can be arranged into groups based on column headers.
To create a grouped report:
1.Click on a column header to select it.
2.Click and hold on the column header.
3.Drag the column header to the grey area just above the header (green arrows and the text "Drag a column header here to group by that column" will indicate where the column header will be placed) (Figure 38.43).
▪In the example below the column header for Connection was dragged to the grouping area.
4.Drop the column header by releasing the mouse button (Figure 38.44).
 Figure 38.42 Dragging a column header into the grouping area |
 Figure 38.43 A report after being grouped by Connection |
Subgrouping of the report is also possible.
To create subgroups:
1.Click on a column header to select it.
2.Click and hold on the column header.
3.Drag the column header to the grey area just above the header (green arrows and the text "Drag a column header here to group by that column" will indicate where the column header will be placed) (Figure 38.45).
▪In the example below the column header for Computer Name and IP Address were subsequently was dragged to the grouping area.
4.Drop the column header by releasing the mouse button.
The hierarchy of subgroups can also be changed by dragging and dropping a sub-grouped item before or after another grouped or sub-grouped item.
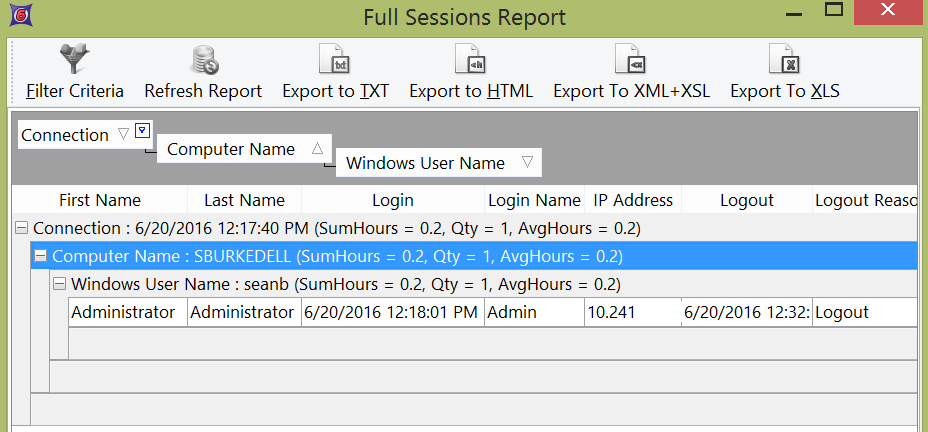
Figure 38.44 Using the grouping feature to create sub-groups
Grouped items can also be further filtered by clicking on the group or sub-grouped heading and checking the box for the sub-group classification (Figure 38.46).
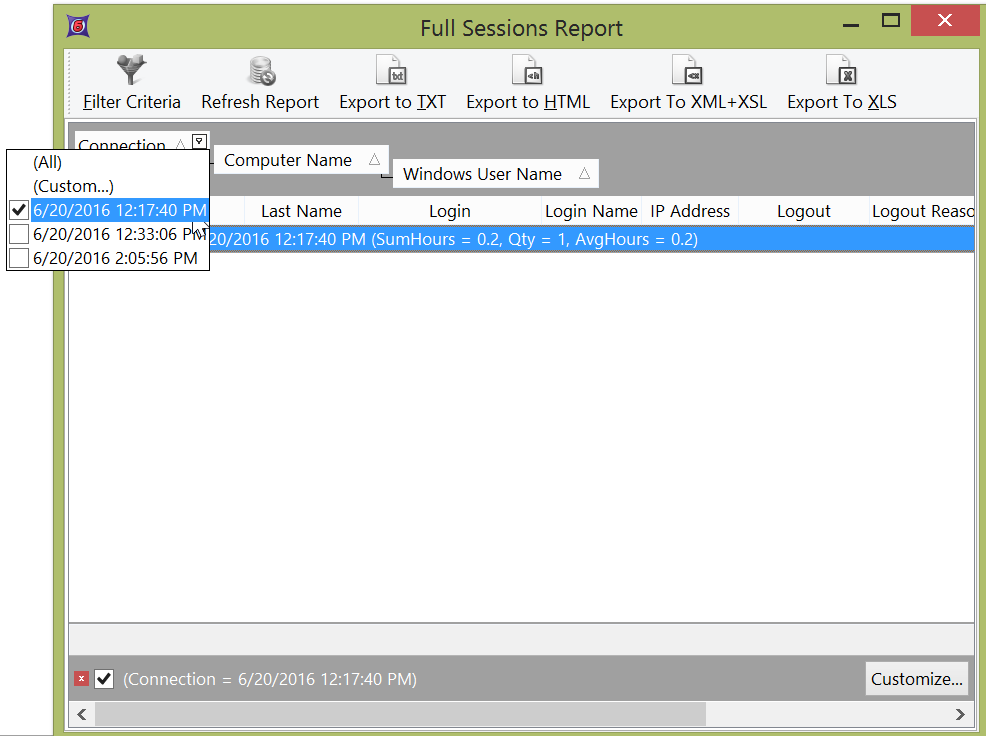
Figure 38.45 Using a check box to further classify a group or sub-group
If the (Custom...) category is chosen you will be prompted with the Custom Filter dialog in which you can define a custom classification for your reports grouping (Figure 38.47 and Figure 38.48 below).
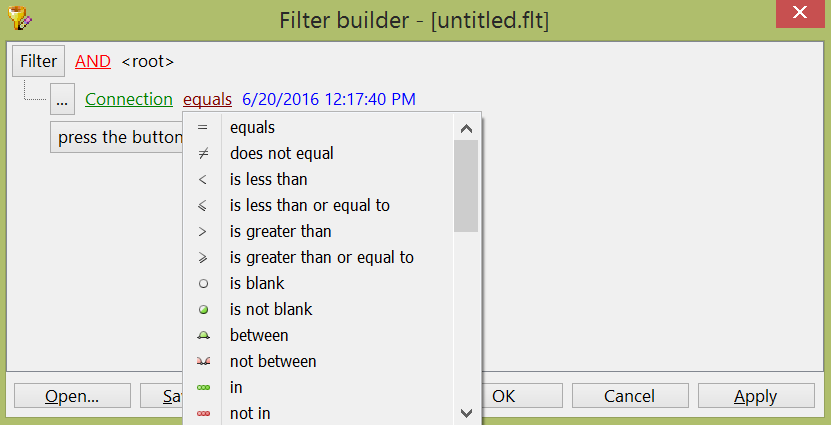 Figure 38.46 Choosing a custom classification for reports |
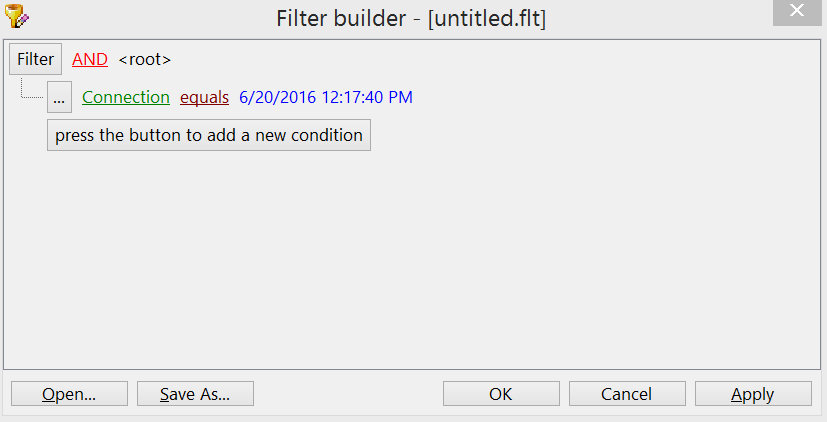 Figure 38.47 Using a custom classification for reports |
Date range filtering may also be done on any column, group, or custom filter using the Filter Criteria button.
Filters may also be saved by clicking on the Save As... button (Figure 38.49 below). The Save the active filter to file dialog will appear where you may save your Filters (*.flt) file to be used again at a later date by clicking Save.
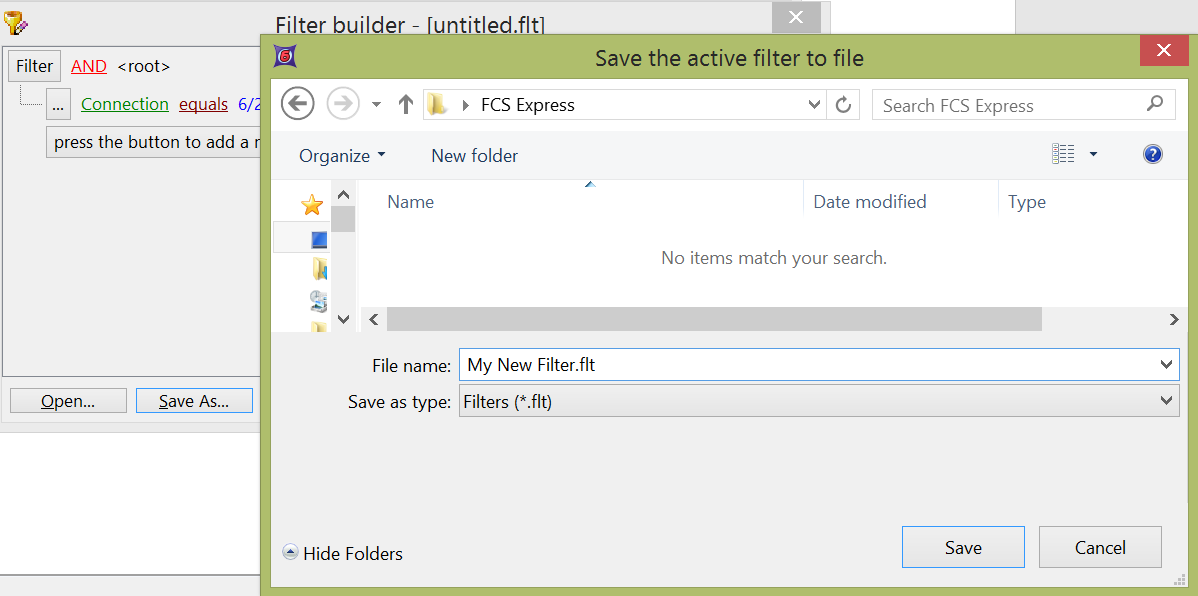
Figure 38.48 Saving a customized filter.
