Formatting Plots Using the Pop-up Menu

Contents
In the course of this example, we will:
•Open a Layout file.
•Insert data into a plot.
•Format a plot using the pop-up menu.
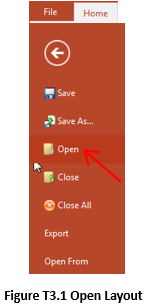
1.Select File tab→Open (Figure T3.1).
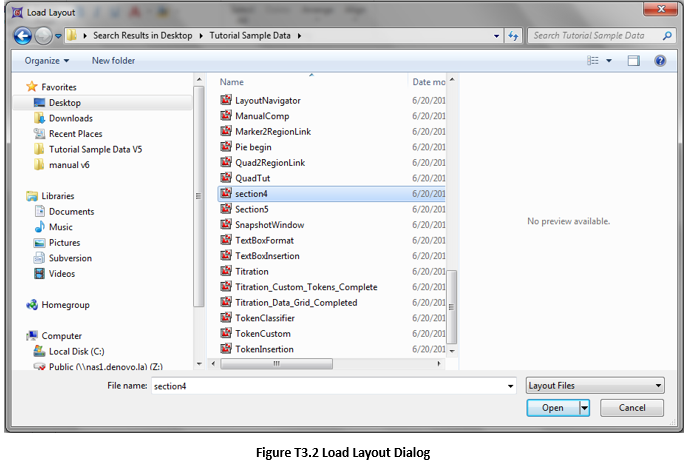
2.Select the section4.fey layout file located in the Tutorial Sample Data archive from the Load Layout dialog (Figure T3.2).
The Layout should have a single blank plot (Figure T3.3).

Figure T3.3 Section 4 Layout
3.Select the Data→Change Data on All Objects→Select command to insert a data file into the plot (Figure T3.4).

4. Select the ApoMono.001 FCS file located in the Tutorial Sample Data archive.
5. Click Open.
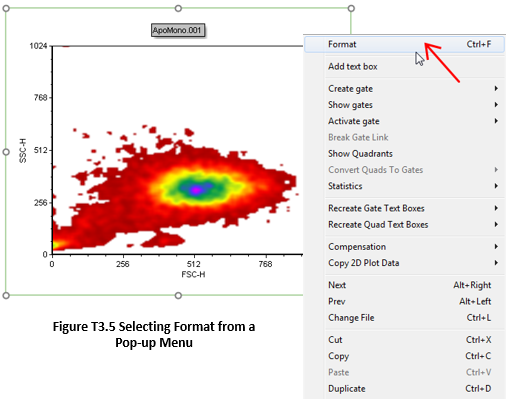
6. Right-click on the plot so the pop-up menu appears (Figure T3.5).
7. Select Format from the pop-up menu.
Even though we have shown this example using a 2D plot, all objects in FCS Express have an associated pop-up menu and are formatted in a similar manner. Simply right-click on the object and select Format from the pop-up menu.
The Formatting dialog for 2D plots is shown in Figure T3.6.
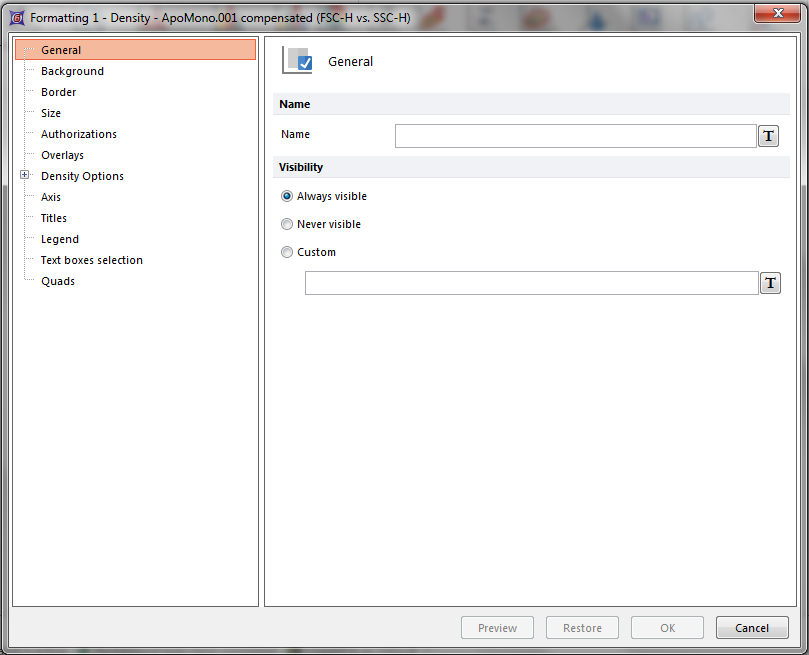
Figure T3.6 Formatting Dialog for 2D Plots
All formatting dialogs in FCS Express share several common features. The section on the left is called the Category List. This list organizes all of the different options for a particular object. The specific categories in the list change depending on which object is being formatted. When you click on a category in the category list, the right hand side of the dialog will change to show the specific options that pertain to that category.
The OK button of the format dialog will become enabled when you change the value of an option. You can also Preview and Restore the options without closing the formatting dialog. Remember, even if you press OK to change your options, and then decide that you don’t like them, you can always undo your changes by selecting the Undo command from the Quick Access Toolbar.
In the next section, we will format multiple plots at the same time.