Undocking a Window
To undock a window:
1.Place the cursor on the top border of the docked Gate Navigator, which is docked on the bottom of the layout.
2.Press and hold the left mouse button while dragging the Gate Navigator up and away from its current docked location.
3.Release the mouse button when the Gate Navigator is at the desired location. Be sure the cursor is not on any of the docking icons.
To undock the docked windows that are using Auto Hide, we need to first turn off the Auto Hide feature; there are two ways of doing this.
4.Move the cursor over the Data Navigator tab to make the docked Data Navigator visible.
5.Click on the Auto Hide icon in the upper right corner of the docked Data Navigator, as previously shown in Figure T11.11, to turn off the Auto Hide feature. Alternatively,
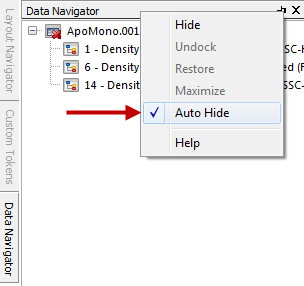
•Place the cursor on the top border of the docked Data Navigator.
•Right-click to bring up the associated pop-up menu.
•Deselect Auto Hide from the pop-up menu, indicated by the cursor in Figure T11.21.

Figure T11.21 Removing Auto Hide using the Pop-up Menu
The Auto Hide feature has now been turned off for all three docked windows, and they can now be undocked.
6.Right-click on the top border of the docked Data Navigator to bring up the associated pop-up menu.
7.Select Undock from the pop-up menu.
Alternatively, the docked windows can be undocked by dragging and dropping them back onto the layout as previously shown.
