Applying Compensation Definitions
Every plot, overlay on a plot, and every file loaded as a plate, can have a different compensation definition. To change the compensation for an overlay, right-click on the plot and select Format from the pop-up menu. Go to the Overlays category, select the overlay(s) of interest, and select the compensation definition you want to use. Alternatively, you can use the Format tab→Plot Options→Overlays command to edit individual or multiple plots.
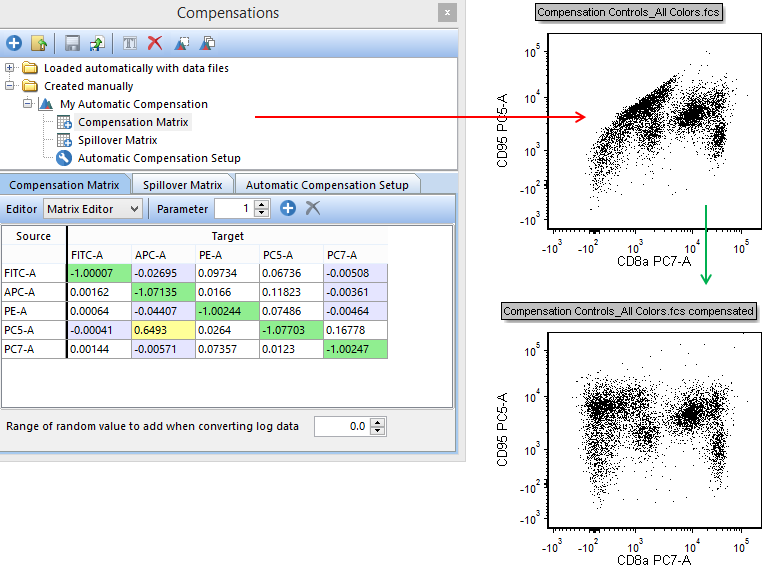
There are also many drag and drop commands for compensations. You can drag and drop compensations from the Compensations navigator to any plot, any layout, and from one matrix to another to apply and edit compensations (Figure 16.18).
To apply a compensation definition by dragging and dropping from the Compensations navigator, follow the steps below.
1. Left click and hold on a compensation.
2. Drag the compensation to the intended plot (red arrow).
3. Drop the compensation by releasing the left mouse button.
The compensation will then be applied to the plot (green arrow).

Figure 16.18 Dragging and dropping a compensation from the Compensations navigator onto a plot to apply the compensation.
Compensations may be dragged and dropped between different layouts by dragging the compensation definition from the Compensations navigator in one layout to the Compensations navigator or on a plot in another layout much like Steps 1 - 3 above. This will allow you to easily apply compensations between different layouts and experiments.
A compensation definition may also be dragged and dropped onto another compensation definition. This allows you to easily copy matrices from one compensation definition to another.
You can set a compensation as default for the layout, so it will automatically apply to all experimental files in your Data List as you click Next/Prev or perform a Batch Process. See the Automatic Compensation and Batch Processing section of the relevant tutorial.
You can save compensation definitions to folders, and have them automatically apply to the FCS files in the folder.
Compensations may be applied to individual or multiple plots by performing either option in the Compensations navigator below. Note if user option Default Compensation to Use is set to any option other than None, the compensation applied will revert to the preference (i.e. Compensation Default or FCS file) when changing the data displayed on the plot or during batch processing.
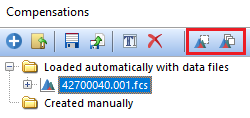
•Left-click to select compensation name from Loaded automatically with data files folder or Created manually folder and click Apply to selected plots or Apply to all plots button in top menu bar (Figure 16.19)

Figure 16.19 -Compensation navigator menu to access options to apply selected compensation to selected or all plots (outlined in red)
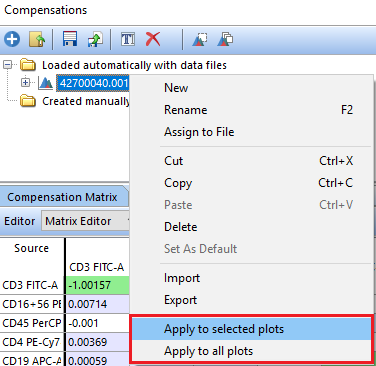
•Right-click compensation and click Apply to selected plot or Apply to all plots button in popup menu (Figure 16.20)

Figure 16.20 - Right-click popup menu to access options to apply selected compensation to selected or all plots (outlined in red)
Additionally, standard copy and paste commands may be used to move matrices from one compensation definition to another within the Compensations navigator.
Note that various other functions in FCS Express allow you to apply a compensation definition. For instance, when performing Parameter Math you can choose whether a compensation definition is applied prior to performing the math.
