Opening and Docking
To begin, we will open a saved layout that already has plots and gates on two pages.
1.Select File tab→Open.
2.Open the layout GateNavigator.fey found in the FCS Express Sample Data folder.
The layout appears, as shown in Figure T15.1.
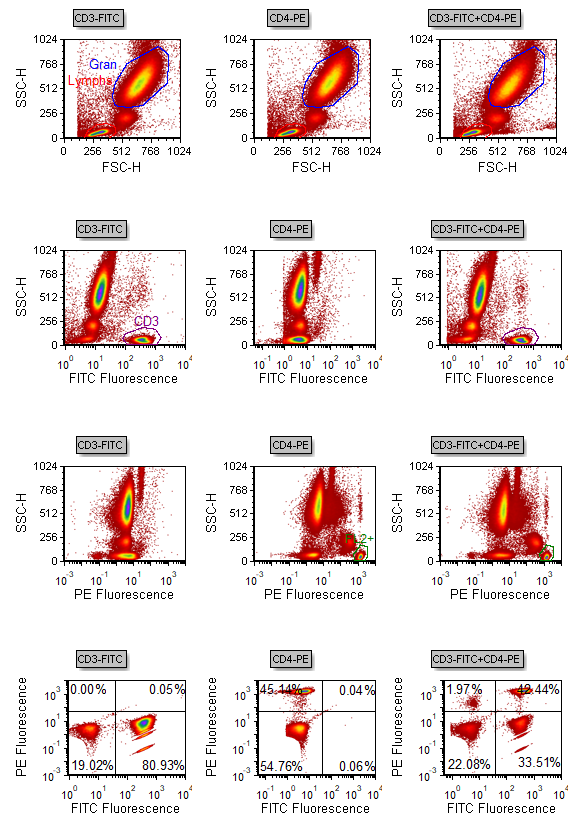
Figure T15.1 Gate Navigator Layout (GateNavigator.fey)
We now will open the Gate Navigator.
3.Select the View tab→Navigators group→Gate Navigator command  .
.
The Gate Navigator appears, as shown in Figure T15.3. We will expand the menu to view all the plots using these gates.
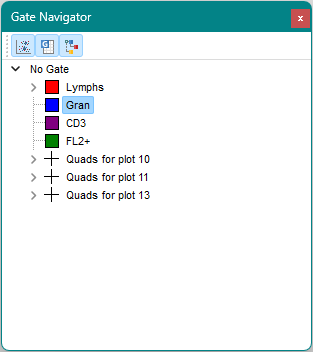
Figure T15.3 Gate Navigator Window
4.Click on the ">" icon to the left the Lymphs gate, indicated by the red outline in Figure T15.3, to expand the menu.
5.Continue to click on the ">" icons until all gate listings are expanded.
Alternatively, you can use the pop-up menu to expand the Gate Navigator menu.
•Place the cursor on the Gate Navigator.
•Right-click to bring up the pop-up menu (Figure T15.4).
•Select Expand All, the blue highlighted text in Figure T15.4.
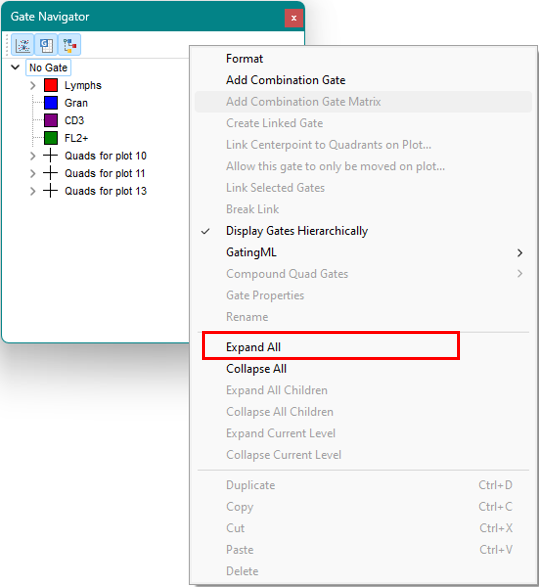
Figure T15.4 Gate Navigator Popup Menu
*Note: The option to show gated plots was selected from Format Navigator Options
The Gate Navigator should now resemble Figure T15.5.
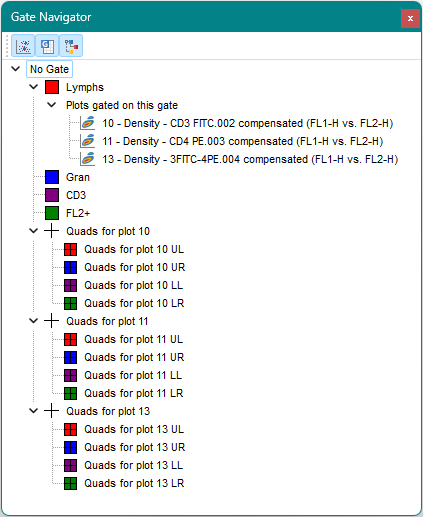
Figure T15.5 Gate Navigator with Listings Expanded
We will now dock the Gate Navigator to the left side of the layout. For more information on docking, please refer to the Docking tutorial.
6.Place the mouse on the title bar at the top of the Gate Navigator window.
7.Press and hold the left mouse button and move the Gate Navigator window.
As soon as you start moving the Gate Navigator window, the four-headed arrows of the docking icon appears in the center of the layout, as shown in Figure T15.6.
8.Continue to hold the left mouse button and move the Gate Navigator toward the left arrow of the docking icon, indicated by the red outline in Figure T15.6.
9.Release the mouse button when the cursor is over the left docking zone sector. You will know you are in the correct place because the blue rectangle, indicating the proposed docking location, will appear on the left side of the layout.
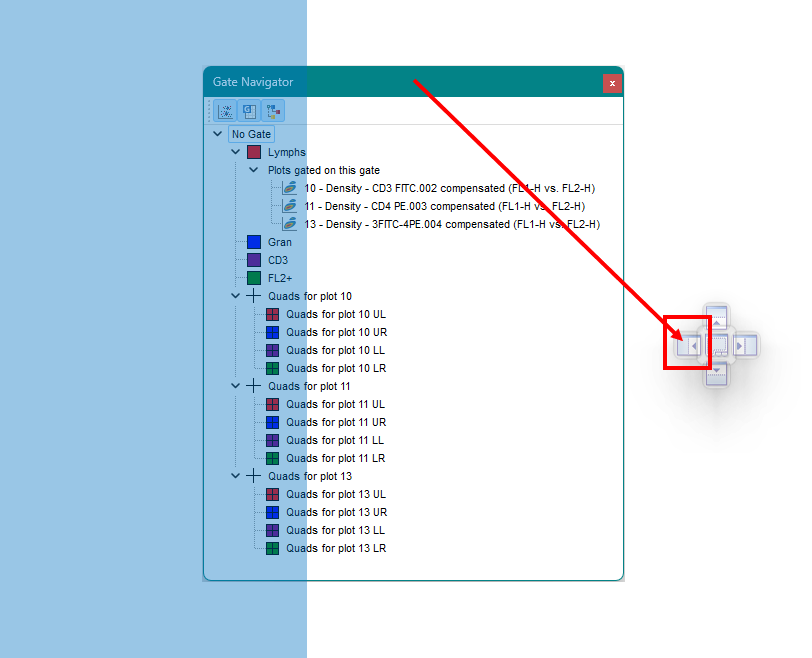
Figure T15.6 Docking the Gate Navigator to the Left Side of the Layout
The Gate Navigator now is docked on the left side of the layout. Docked windows may be resized. We will resize the docked window it to make it wider.
10. Place the mouse over the outer right border of the docked Gate Navigator.
11. Move the mouse slightly over the border until the resizing icon appears, indicated by the red outline in Figure T15.7.
12. Press and hold down the left mouse button and continue to hold it while dragging the border to the right.
13. Release the mouse button when the docked window is large enough to show all the text of the Gate Navigator, as shown in Figure T15.7.
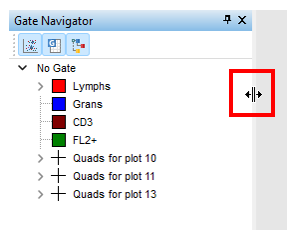
Figure T15.7 Resizing the Gate Navigator
In the next section, we will explore the features of the Gate Navigator.
