Linking Markers to Gates
When a marker is linked to a gate, the gate is automatically resized as the marker is resized or moved. A marker can be linked to any existing 1D gate using the Marker list in the Formatting Markers dialog.
You can also create a new gate from a marker and link it automatically. To do so:
•Right-click on the histogram, select the appropriate marker, and then select Convert Marker to Gate→Convert and Link from the pop-up menu; note, if you choose Convert only, the gate will not update if you move or resize the original marker. If the Show prompt window radio button is set in Gate creation prompt options (Gate category of Options dialog), you will be prompted to enter a name for the new gate.
To break a linked gate, either:
1. Use the Format→1D Options→Markers command to bring up the Formatting Markers dialog (or right-click on the histogram, select Format from the pop-up menu, and choose the Markers category).
2. Select the Marker from the list on the left.
3. In the Linked Gate drop-down list, change the selection to No Link.
or,
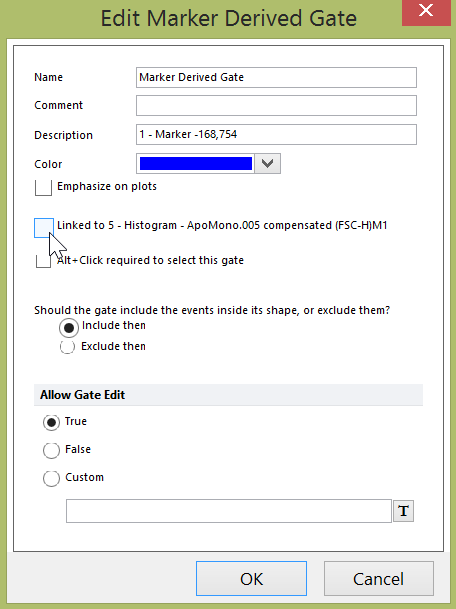
1. Access the Edit Gate dialog from the Gate View object.
2. Uncheck the Linked to... box (Figure 9.43)

Figure 9.43 Unlinking a gate from a marker in the Edit Gate dialog
A 1D gate can be automatically created every time a marker is created. This option cab be activated:
•On one or more existing histograms by checking the Create a Linked Gate check box in the Histogram Markers dialog of the histograms of interest.
•By default on every new histogram by by checking the Create a Linked Gate check box in the 1D Plot Preferences user options.
