Accessing Data Specific Gates
To review accessing Data Specific Gates, we will use the layout from the previous section, continuing from the last step. In this section, we will access Data Specific Gates (DSGs) via the Gate Navigator.
1.Click View tab→Gate Navigator command  .
.
2.Expand Gate 1 node by clicking on the "˅" symbol n its left. There are nodes for: plots gated from this gate, Data Specific Gates, and children gates.
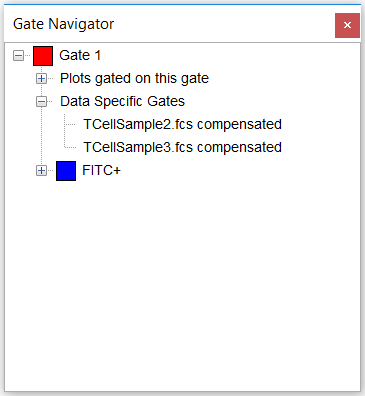
3.Expand the Data Specific Gates node by clicking on the the "˅" symbol on its left to view data files using the DSGs (Figure T4.43).

Figure T4.43 Gate Navigator Displaying Data Specific Gates for Gate 1
Note: only two DSGs exist for Gate 1 (TCellSample2.fcs and TCellSample3.fcs data files) because TCellSample1.fcs is using Gate 1's master position - the universal gate placement as it was drawn initially.
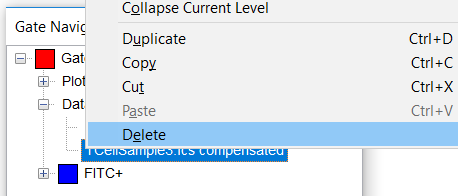
4. To remove a Data Specific Gate and revert to using the master position for TCellSample3.fcs, right-click the data file name in the Gate Navigator under Data Specific Gates under Gate 1 and choose Delete (Figure T4.44).
Alternatively, you may click Gate 1 on the Plot 3 and click Gating tab→Data Specific Gate command to deactivate or remove the data specific gate.

Figure T4.44 Deleting a Data Specific Gate from Gate Navigator
Plots 1-3 should now resemble Figure T4.45.

Figure T4.45 Master Gate for Plots 1 and 3 While Using Data Specific Gate for TCellSample2.fcs on Plot 2
Note: Please save this layout to your desktop if unable to complete the next tutorial section.
