Saving and Loading Panels
In the course of this example, we will:
•Work with the layout that was created in Creating the Layout section.
•Learn how to save and load panels for future use.
We now will proceed to saving and loading the panel we created for future use.
1.Click the Data tab→Organize Data Sets group→Panels command ![]() . Alternatively, click the Batch tab→Organize Data Sets group→Panels command
. Alternatively, click the Batch tab→Organize Data Sets group→Panels command ![]() .
.
The Panel Information dialog appears with My Panel (2 tubes) listed and checked to be active.
2.Click the Save button on the Panel Information dialog.
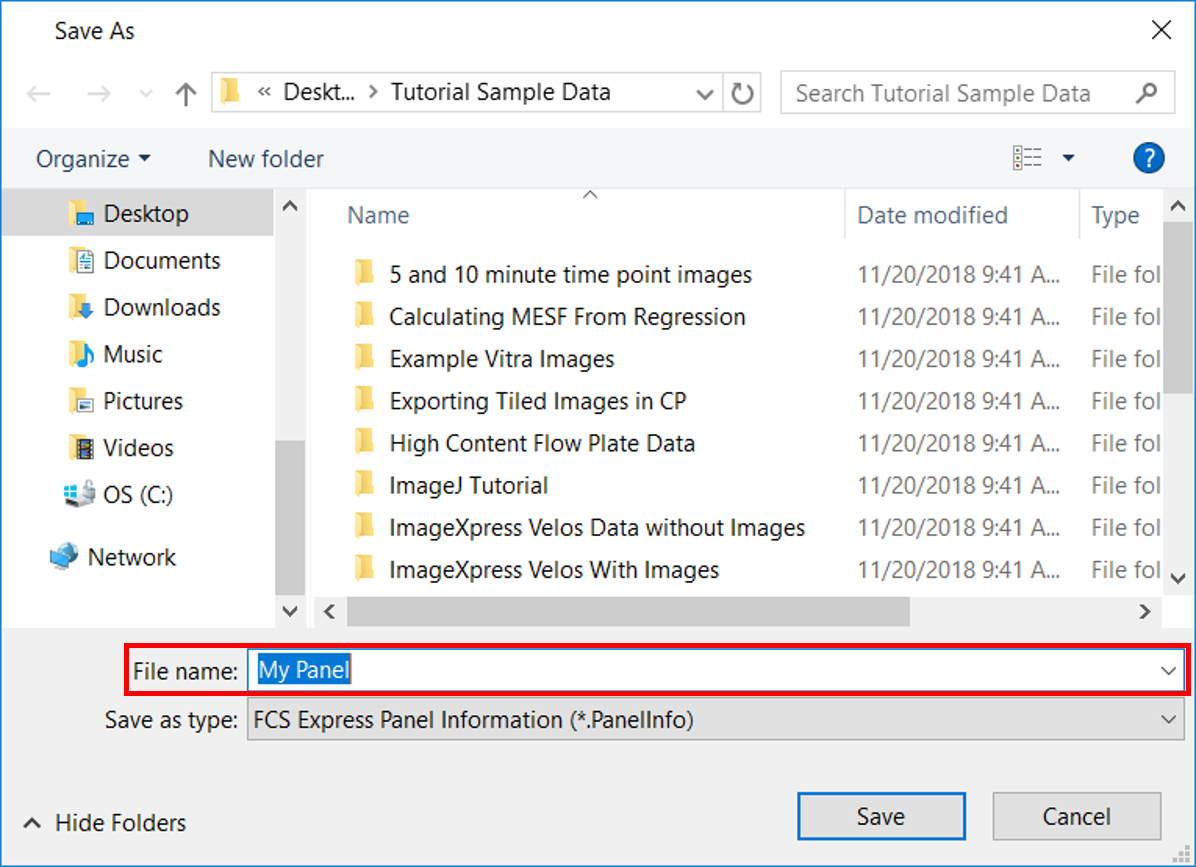
The Save As dialog appears (Figure T11.44).
3.Navigate to the Tutorial Sample Data folder and enter "My Panel" in the File name field (Figure T11.44, blue highlighted text in red outline).
4.Click Save in the Save As dialog.

Figure T11.44 Save As Dialog
We have saved My Panel. We will now save the current layout, and then load the saved panel into a new layout.
5.Click on Cancel to close the Panel Information dialog.
6.Select the File tab→Save, to save the current layout. Alternatively, select the Save icon located in the Quick Access Toolbar.
If you have not saved the layout previously, then the Save Layout dialog appears. If you have saved it previously, please skip to step 9 to continue.
7.Navigate to the Tutorial Sample Data folder and enter "Panel Demo Layout" in the File Name field.
8.Click Save on the Save Layout dialog.
9.Select the File tab→New Layout, to open a new blank layout. Alternatively, you may use Ctrl+N to open new layout. A new blank layout will appear.
10. Select the Data tab→Organize Data Sets group→Panels command. Alternatively, select the Batch tab→Organize Data Sets group→Panels command ![]() . The Panel Information dialog will appear, and it will be empty.
. The Panel Information dialog will appear, and it will be empty.
11. Click the Load button on the Panel Information dialog. The Open dialog will appear.
12. Navigate to the Tutorial Sample Data folder and select the "MyPanel.PanelInfo" file.
13. Click Open.
The Panel Information dialog will show My Panel. Saving a panel allows you to avoid having to redefine a panel repeatedly for every new layout you create.
14. Click on OK to activate My Panel and close the dialog.
My Panel is now active on this layout and you could choose to create a new layout of plots to analyze with this panel.
