Importing and Exporting Gates with GatingML
FCS Express allows the export and import of gates into any layout using GatingML - a standard file format to formally describe gates and facilitate the exchange of gating information between experiments and collaborators. Developed by the International Society for the Advancement of Cytometry (ISAC), the GatingML format stores a textual representation of any gate or gating hierarchy within an experiment as an XML file.
The GatingML format can be imported into FCS Express to add new gates or replace existing gates. Gates can also be saved and exported from FCS Express in the GatingML format for later use - such as archiving gate information or sharing gating strategies between collaborators.
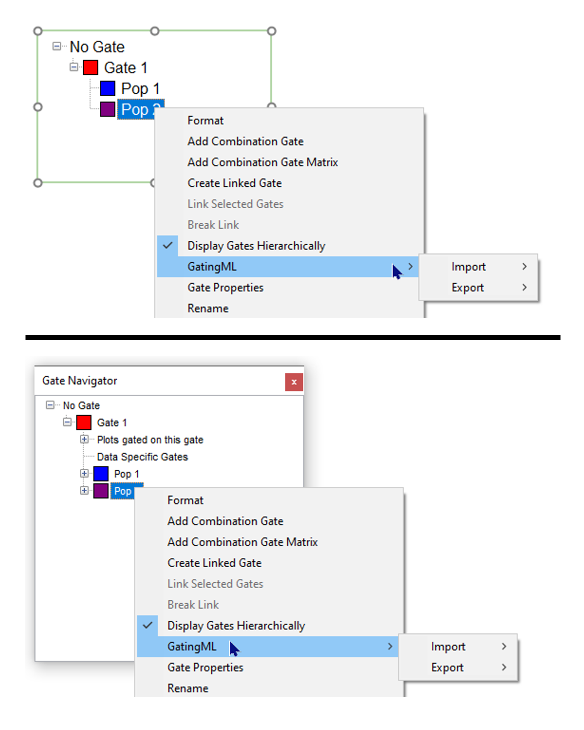
In FCS Express, the GatingML import and export options can be accessed from the Gate View or Gate Navigator windows by right-clicking on the window or desired gate (Figure 7.41).

Figure 7.42. Accessing the GatingML Import and Export Options from the Gate View (top) or Gate Navigator (bottom) windows.
Exporting Gates with GatingML
All Gates (complete gating hierarchy) or Selected Gates can be saved and exported in the GatingML format.
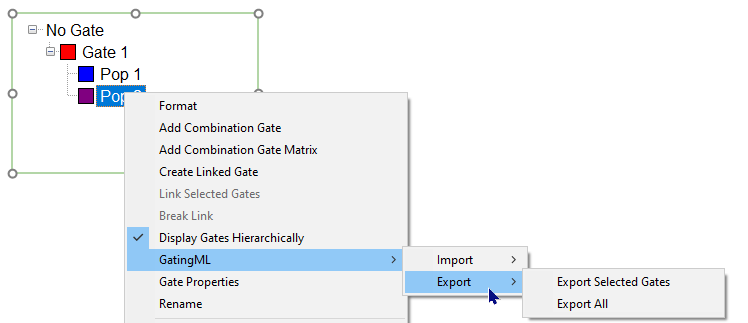
To Export All Gates within a layout (Figure 7.42):
1. Right-click on the Gate View or Gate Navigator window.
2. Select GatingML → Export → Export All.

Figure 7.43. Export All Gates in the GatingML format.
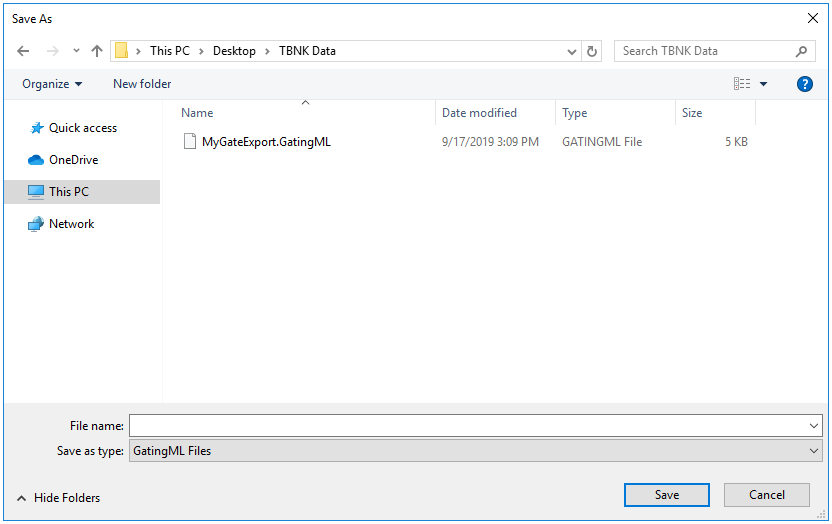
3. The Save As window will appear. Name the file and select the desired export location (Figure 7.43).
4. Click OK to export. All Gates on the layout will be exported as a single file in the *.GatingML format.

Figure 7.44. Select Export Location for GatingML.
To Export Selected Gates within a layout (Figure 7.44):
1. Select the desired gate(s) to export within the Gate View or Gate Navigator window. To multiple-select gates hold down Ctrl then left-click the gates.
2. Right-click on the selection. Select GatingML → Export → Export Selected Gates.

Figure 7.45. Export Selected Gate in the GatingML format.
3. Name the .GatingML file and select the desired export location (see Figure above).
4. Click OK to export. Only the Selected Gates will be exported as a single file in the *.GatingML format.
Importing Gates with GatingML
Note: A layout must be set to Remember Parameter by Name to be able to import gates with the GatingML format. After a layout has been created the Remember Parameter option cannot be changed. A layout needs to have this option set before any kind of FCS Express template is created.
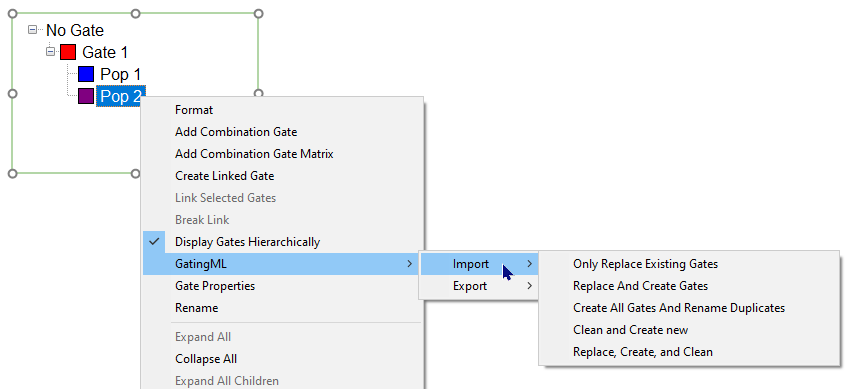
Gates can be imported into FCS Express in the GatingML format. The following import selections are allowed when importing gates into FCS Express (table below, Figure 7.45):
Import Selection |
Description |
|---|---|
Only Replace Existing Gates |
If a gate exists on the layout with the same name as an imported gate, it will be replaced by the imported gate. All other gates are unchanged. |
Replace and Create Gates |
If a gate exists on the layout with the same name as an imported gate, it will be replaced by the imported gate. If a gate is not present on the layout, it will be created as a new gate. All other gates are unchanged. |
Create All Gates and Rename Duplicates |
If a gate is not present on the layout, it will be created as a new gate. Imported gates will be renamed if a gate exists on the layout with the same name. All other gates are unchanged. |
Clean and Create New |
All existing gates on the layout will be deleted. Imported gates will be created as a new gate. |
Replace, Create, and Clean |
If a gate exists on the layout with the same name as an imported gate, it will be replaced by the imported gate. If a gate is not present on the layout, it will be created as a new gate. All other gates on the layout will be deleted. |

Figure 7.46. GatingML Import Options.
To Import Gates onto the layout (Figure 7 above):
1. Right-click on the Gate View or Gate Navigator window.
2. Select GatingML → Import. Left-click on the appropriate Import Selection (see table above).
The imported gates will appear in the Gate View and Gate Navigator. To display the imported gates on a plot, right-click on the plot and select Show gates. Select the desired gate. To display the Gate Text boxes, right-click on the plot and select Recreate Gate Text Boxes → Missing.
Gates can also be exported in the GatingML format with Batch Processing. This option should be utilized when multiple files on the layout contain Iteration Snapshots with iteration specific gate coordinates and these iteration specific gate coordinates need to be archived or shared for collaboration purposes. When using Iteration Snapshots, the Re-Run mode should be utilized to preserve the active snapshots on the layout.
NB: If Data Specific Gates are defined for one or multiple gates in an Iteration, only the Master Gate of those gates will be included in the Gating ML export.
