Gate View
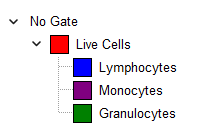
The Gate View object (Figure 5.161) is an interactive legend of all the gates in your layout. As an object, the Gate View will be printed and displayed like any other object. The Gate Navigator may also be used to view/edit gate information but the Gate Navigator will not be treated as an object and cannot be printed or exported.
The Gate View may be formatted in many ways to changes its aesthetics, to display Data Specific Gates, and/or to display plot navigator items. Please see the chapter on Formatting the Gate View for more information.
To insert a Gate View, select the Insert tab→General→Gate View ![]() command.
command.

Figure 5.160 Gate View Showing Hierarchy
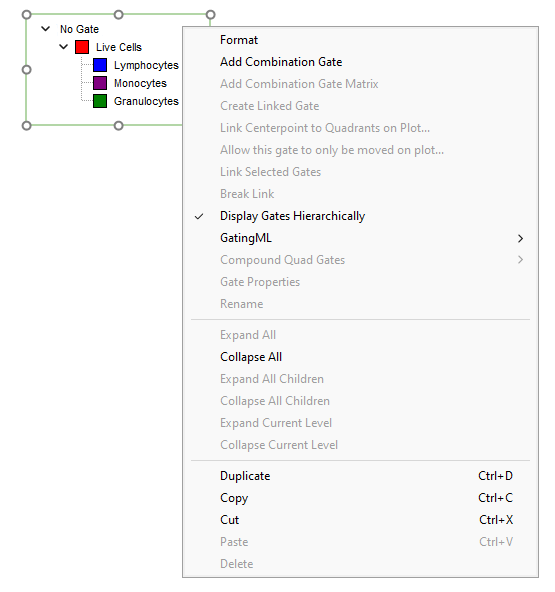
A right-click menu is available within the Gate View dialog as displayed in Figure 5.162 below. The right-click menu allows users to:
•Format the Gate View
•Link Centerpoint to Quadrants on Plot
•Allow this gate to only be moved on plot (this option allows you to restrict the movement of Gates and Quadrants to a single specified plot; please refer to the Moving and Resizing Gate and to the Moving Quadrants chapters for more details)
•Break Link between linked gates
•Display Gates Hierarchically (this is flagged by default)
•Gate Properties for the selected gate (see below in this page)
•Rename the selected gate
•Expand/Collapse All gates
•Expand/Collapse All Children gates within the selected gate
•Expand/Collapse Current Level (this expand only the first level of children gates within the selected gate)
•Duplicate/Copy/Cut/Paste/Delete the Gate View or the selected gate

Figure 5.161 The Gate View right-click menu.
Many of the actions can be performed directly from the Gate View as follows:
•To delete a gate from the entire layout, select the gate in the Gate View and press the Delete key.
•To rename a gate, double-click the gate in the Gate View and type in the new gate name in the Name field and press Enter.
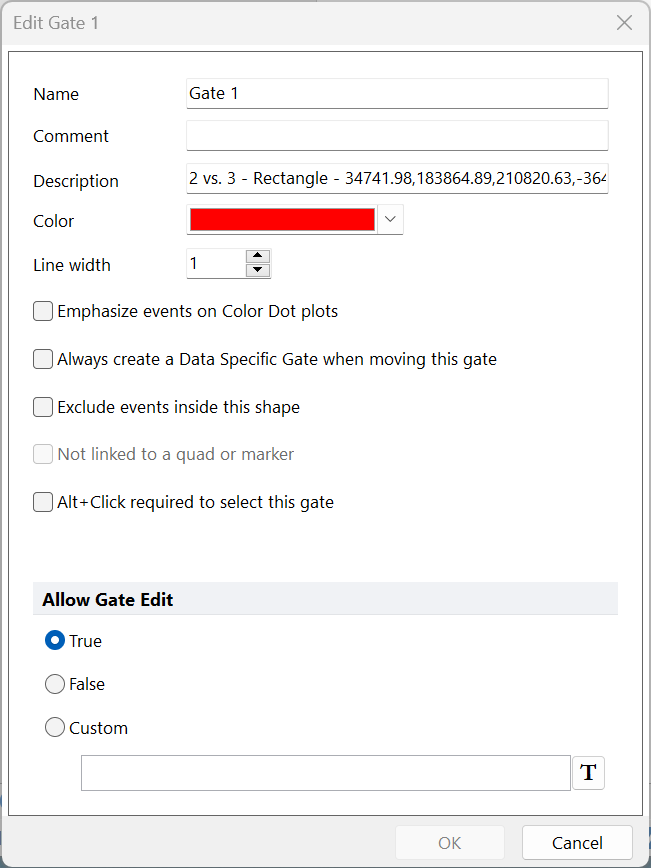
•To edit many of the gate properties, double-click on the gate in the Gate View to bring up the Edit Gate dialog (Figure 5.163). From the dialog you can change the gate Name, add a Comment, change the Color*, Adjust Line Width, Emphasize the gated events on plots, , Always create a Data Specific Gate when moving this gate, Include or Exclude the events inside the gates shape, and, if applicable, break the link to a marker. If you check Alt+Click required to select this gate, then clicking on the gate will not select the gate unless the Alt key is being held. This will prevent accidental changing of the gate vertices.
▪Additionally, the ability to edit the gate is controlled through the Allow Gate Edit section.
•Selecting the True radio button allows edits to the gate.
•Selecting the False radio button prevents edits to the gate.
•Selecting the Custom radio button allows the user to define a value or condition based on a token or custom token that must be met in order to edit the gate.
•To rearrange the hierarchy of the gates, drag and drop the gates within the Gate View. For example, to make a gate a child gate of another gate, drag the child gate onto the parent gate. Also note that a gate may be placed in a specific position in the hierarchy at the time of creation using the Parent Gate drop down.
•To gate a plot on a gate, drag the gate from the Gate View onto that plot.

Figure 5.162 Edit Gate Dialog
* Note: If Gate Color has been changed, text color within the Gate Text Box will no longer match. To recreate this text with the current Gate Color, right-click on the plot and select Recreate Gate Text Boxes from the pop-up menu.
Note: The actions above may also be completed through the Gate Navigator.
